Follow Me on Pinterest
Showing posts with label birthday. Show all posts

Tuesday, September 9, 2014

Cakes on Parade

Decorating cakes is a skill I picked up from my mother. She always made us beautiful cakes in bright, fun colors for our birthdays. Some of my favorites were Rainbow Brite and the stand-up Care Bear - if I get super ambitious I'll find some old photos and insert them into this post at some point. When I was old enough, she would use a cup of extra cake batter to bake a small cake for me to decorate and give me her frosting bags when she was finished. Over the years I picked up most of her skills (I never really mastered the rose piping technique) and developed some new skills of my own. As my mom has been affected by arthritis and carpal tunnel in recent years I've taken over a lot of the family cake decorating. In fact, I'm pretty sure it was decided before he was even born that my nephew's first birthday cake would be made by his adoring Auntie M.

I thought it would be fun to showcase a few of my favorite cakes I've made recently culminating in my latest accomplishment - my little nephew's Jake and the Neverland Pirates 1st birthday cake!!


Sunday, April 13, 2014

Frozen Party

My bug is five (FIVE!) years old now. I'll spare you a bunch of cheesy comments about "time flying" and feeling like it was "just yesterday that she was born". The truth is that some days being her mom have been amazing and others have been really, really hard. Even on our worst days, I love her with all of my heart. This year I had a blast planning a Frozen themed birthday party to celebrate what a special little girl she is to me.

Thanks to the internet and Pinterest I've been researching ideas for her party for months. I thought it would be fun this year to share "inspiration" versus "actual" photos of our party details. I'll fill in a few more details and post larger photos in a separate post later this week.


I really wanted to share these photos early, check back later this week for tutorials, recipes, etc! As always, I hope my work inspires someone else out there!

Saturday, April 5, 2014

Happy Birthday Mom

My mom's birthday was actually last month. In the month prior to her birthday and the entire month after her birthday I've been trying to think of the perfect gift. In the past I've given her jewelry, photos of the girls, clothing, gift cards - all the usual "mom" gifts. And after living in her house for the past few months I could think of plenty of *stuff* to give her. But for some reason that really just doesn't feel like enough this year.

Why is it so hard? It's not something specific she did. Or something she said. Or really any one thing at all. It's that it just hit me. I'm a 31 year old woman living a parallel life to the one my mother must have lived 25 years ago. Sure, there are some obvious differences. I work out of the home, my mom babysat at home. My dad worked long hours and rarely helped with cooking or cleaning and left the majority of the parenting responsibilities to my mom. My husband neglects much (but not all) of the household work, but is 100% my full time partner in parenting. Money is slightly less of an issue for me than it was for my mom.

But if you throw out the details, the core of our everyday lives is too similar to ignore. Raising two little girls, trying to be a good wife, working hard, and going to bed exhausted. And the heartbreaking fact of it all - what I think has been keeping me up at night -  is that the vast majority of these earliest efforts at motherhood will go unremembered and without thanks.

Now that I am on the other side of the equation, I feel like the number of things I want to thank my mother for could fill volumes. The amount of gratitude I feel seems like it couldn't possibly be expressed through anything you'd find at the mall. So today I am presenting my mother with my genuine thanks for all those things she thought were forgotten.


To My Mom,

Thank you for getting up early, even when you wanted to sleep for two more hours.
Thank you for making me breakfast and talking me down from the edge when there wasn't any more of my favorite cereal left and I had to settle on something else.
Thank you for doing the laundry so I had clean clothes to wear every day. And thank you for biting your tongue when I put ridiculous outfits together.
Thank you for putting my toys away eight times a day as I left a trail of destruction behind me on my quest to have fun.
Thank you for listening with rapt attention to my long winded nursery school stories about nothing that I forgot the point of halfway through.
Thank you for not killing me when I threw a tantrum about nothing and wouldn't stop screaming for twenty minutes.
Thank you for grocery shopping with me and having to explain over and over again why we did need frozen vegetables and did not need frosted animal crackers.
Thank you for finding a way to make holidays magical even when you were tired, stressed, and couldn't really afford all the things you wanted me to have.
Thank you for spending hours decorating beautiful cakes for my birthday parties.
Thank you for making family vacations special. They might not have always been what you wanted, but were what we could afford and you made the best of it.
Thank you for playing silly games with me when you would rather have laid on the couch and gone to sleep.
Thank you for staying up all night when I was sick with painful ear infections.
Thank you for cooking me dinner every night, even when I told you it was gross and refused to eat it.
Thank you for reading me the same books over and over at bedtime even when you hated them.
Thank you for never getting a sound night's sleep because you were constantly on the alert for my nightmares, sleepwalking, and sleep talking.
Thank you for being willing to do it all over again so I could have a sister.

Thank you for all of this and so much more.


Saturday, March 22, 2014

Frozen Day 4 - Tutu photo tutorial!


So when I started my "5 days of Frozen" I intended it to be five consecutive days. Seriously, I have no idea how I thought that was going to happen. Life is just too crazy for a working mama with two kids under the age of five to really expect enough free time FIVE DAYS IN A ROW to accomplish anything more than keeping everyone alive. In my defense, I did create the two pretty sweet Anna and Elsa tutus you're about to read all about. They are actually really easy to make and I finished each one with just a few hours of mindless work after the girls went to bed.


Without further ado, here is my photo tutorial...

Step 1: Measure the waist of your birthday girl/princess/monster child. I was ready to start my little one's tutu when she was napping, so I based her waist measurement on a pair of pants I knew fit her well. Whatever your measurement is, subtract 1-2 inches (1 for a smaller tutu, 2 for a bigger one) before cutting your elastic. You do this because the elastic gets stretched as you tie the tulle. Trust me. If you don't subtract some length, the tutu won't fit!

Step 2: Overlap the ends of your elastic by ~1 inch and sew. You can use a machine or do it by hand like I did. I like to fully secure the elastic ends by sewing a square.

Step 3: Measure and cut your tulle. I used 25 yard rolls of tulle in different colors from Hobby Lobby. The amount you will need depends on how full you want to make your tutu. For my older daughter I used two full rolls and about 1/2 of a roll of glitter tulle added as an accent. I measured by using a rigid mailing envelope to wrap a large amount of tulle around and then cut one end to create many strips with one cut. For the bigger tutu I wrapped the long way around the envelope and the opposite for the smaller one (I was making the smaller one in this tutorial).

Step 4: Start tying the tulle. Fold the tulle in half and create a loop. Place the loop behind the elastic. Pull the loose ends up and through the loop. Pull just until the loop is wrapped around the elastic with the loose ends pointing down. How tight you make the knot (and how close together you squeeze the pieces of tulle) will determine how full your tutu is at the end.

Step 5: Keep tying! Repeat step 4 until the entire elastic band is covered.

Step 6: Once the entire band is covered, you can add more tulle on top of the first row if you want to make it fuller. This was really hard to capture a photo of, but basically you just add another loop between pre-existing loops and don't pull it as tight allowing it to lay on top of your base layer of tulle. I also did this on my Elsa tutu with the glitter tulle that I added at the end.

Step 7: Add on any embellishments you want! I didn't add anything to the little bear's tutu because I didn't want her to be enticed to pull it apart, but I did sew on some snowflake ribbon I purchased after Christmas for my bug's tutu. Other add-on ideas include a big bow, ribbons, or sequins.

FYI: The shirts were made by a local small business RyleighRoo

Tuesday, January 14, 2014

Iced Coffee Cupcakes

No, I haven't given up on Weight Watchers already. It just so happens that January is an incredibly busy month for birthdays among my family, friends, and coworkers. Diet or no diet, cupcakes are kinda my thing when it comes to celebrating someone's birth. Don't worry, I ate light all day yesterday so I could test out the frosting and make sure I had the perfect blend of flavors:-)

The cupcakes I'm blogging today are for someone very special at my practice -  my office manager and good friend. She has really been my lifeline since I joined the group just over two years ago. There have been quite a few bumps along the way for me and she has been on top of them all helping me get in touch with the right people and getting answers in a timely manner. She's also a huge reason my practice has built so quickly - she actively works the phones to recruit patients to the office and then presents a happy, smiling face at the desk that welcomes families and makes them feel at home. Aside from business, I also genuinely really like her personally. She's a great mom to her own "big kids" and is always offering me encouragement through the rough times with my monsters. In short, she's pretty great. And really, making this fabulous lady a few cupcakes doesn't even begin to thank her for all she does. But I hope it's a start.

So without further ado, I present a cupcake many Pinterest articles came together to create...I call them Dunkin' Donut Iced Coffee Cupcakes.

My inspiration was my friend's daily morning brew from DD. I blended elements from a few different recipes and modeled the final "look" after two or three different images I came across when searching for "coffee cupcakes" on Pinterest. I assure you, they really are as good as they look.

If you want to try making your own, I got the cake recipe from here. I followed it exactly as written using her modifications in red. The frosting was my own recipe that you will find below. The "sprinkles" are actually just a dusting of organic raw sugar from Trader Joe's. I tried to mimic the DD look by using pink cupcake wrappers and garnishing with actual straws from the restaurant.

Milk and Coffee Buttercream Frosting
2 1/2 sticks of butter, at room temperature
3 cups of confectioner's sugar
1 tsp vanilla extract
1 tbsp whole milk
1 tbsp hot water + 2 tsp instant espresso (dissolve coffee in water)
  1. Beat butter on medium speed in the bowl of a stand mixer until very soft and "white" in appearance.
  2. Add 2 cups (240g)* confectioner's sugar, vanilla extract, and milk to the mixer and beat for at least two minutes until smooth and thick.
  3. Remove 1 1/2 cups frosting from the mixing bowl and set aside.
  4. Add 1 cup (120g) confectioner's sugar and the espresso/water mixture to the mixer bowl and beat for at least 2 minutes.
  5. Decorate cupcakes by piping large circle of coffee buttercream first, then smaller circle of "milk" buttercream. Sprinkle with sugar and top with straw (if desired).
*I use a small food scale to measure the sugar and get more precision in my recipes.

Wednesday, April 17, 2013

Brave Party: Getting In Character

This begins my series on planning and throwing my daughter's Brave themed birthday party. I will preface each post by reminding readers that the day of the party was SO hectic (we arrived to the party location late due to a mix-up with the balloons and had a cranky teething 5 month old that only wanted mommy or daddy) that many photos were missed. I will describe any additional details that I don't specifically have photos of.

To set the stage, the party was hosted at my parent's house. They are currently in Florida so I was able to use their house completely at my whim - taking down pictures, putting up decorations days in advance, etc. I set up their living room as a general play area with kid-sized tables for eating, the dining room and kitchen as food stations, my sister's old bedroom as a dress-up room, my old bedroom as a craft room, and my parent's bedroom as my storage room.

Starting at top left and going counterclockwise: Baby bear in her crocheted bear hat, Me in my Brave tapestry shirt, Birthday Girl in her Merida dress, Merida ribbon headbands, and Bear ear headbands.

One of the things I really wanted to set the mood for the party were costumes and accessories to help the guests really feel like they were part of the movie.

  • This started with finding a Merida costume for the birthday girl. I had my sister check the official stores in Downtown Disney for the highest quality dress possible, but they were not yet selling a Merida dress. I settled for one from the Disney Store online. It is not nearly as nice as the Cinderella one we purchased in the Magic Kingdom, but is far better than the cheap ones they sell at the toy stores.
  • Bug's favorite part of Brave is when the little brothers turn into bears. I knew I had to find a way to turn her little sister into a bear too. A quick search on pinterest brought up a very cute Brave inspired knit hat. I forwarded the photo to a friend whose cousin crochets and within days she produced the adorable hat you see above. 
  • During one of my many virtual shopping experiences online at the Disney Store I stumbled across a woman's shirt depicting the family tapestry (on sale of course!) and had to buy it for myself so I could be in character as well.
To allow the guests to get into the spirit of the movie I set up my sister's old bedroom as "Queen Elinor's Closet" and filled it with accessories... 
  • Keeping with the bear theme, I created a bunch of headbands with bear ears for guests to wear at the party. I purchased the purple headbands (how lucky that the only color available fit my color scheme perfectly!) for less than fifty cents apiece at Party City and made the ears out of black and gray felt. I loosely based them on this tutorial I used last year to make Mickey ears.
  • The Merida headbands were a project I couldn't help making after I found this tutorial on pinterest. I used her ideas, but decided to make Merida's fancy dress instead of the casual dress featured in her directions. If I ever get around to it, I will post my own tutorial.
  • Not pictured: I set up my sister's old desk with piles of Brave temporary tattoos and water/washcloths to apply them. I used my sister's old dresser to lay out all of the headbands I made. I also put out various beaded necklaces and plastic rings with a few handheld mirrors for the kids to dress up and check themselves out.

Wednesday, April 13, 2011

Post 11 - Birthday Details!

This is mainly going to be a photo post with pictures of the "special touches" I worked on for bug's birthday party. Enjoy!


As seen in the banner post, this is my centerpiece for the party. Birthday banner and balloons set the stage for the food/dessert table. My husband didn't take any closer-up photos of my treats, but you can kind of see the five glasses across the front of the table. The two on the ends contain my super chocolate-y cake pops (a bunch of simple round ones in coordinating colors to match the party decorations with one owl in the middle) and the other three are the molded owl chocolate lollipops.


My cousin's son asking for someone to please open a cake pop for him! Pops were dipped in light green, orange, pink, and yellow white chocolate or dark chocolate and tied with dark brown ribbon.

Bug's "Guess Whoo's Two!" shirt.
Shirt from Hobby Lobby for less than $3 ( on sale from regular price $2.99), iron-on letters from AC Moore with a 40% off coupon for about $3, and owl iron-on from Michael's for $2.


Bug enjoying a molded chocolate owl pop!

Owl birthday cake made by me!
The owl was crafted using Wilton's mini stand up teddy bear cake pan. I carved out the cake to make the shape I wanted and then decorated it to make it look like an owl. The owl is the same chocolate cake used to make the cake pops (only 1 cup of batter is needed to fill the pan, the rest I baked and crumbed for the pops). The layer cake is a vanilla white cake. All of the frosting is an an adaptation of my mom's decorating icing.

Monday, January 31, 2011

The winner and more!

Thanks to everyone who participated in the voting for Maddie's second birthday party - the winning theme is Cute as a Bug!

Now that I finally have my theme, I'm ready to start the slow process of working on all of my homemade crafts - decorations, invitations, and cake/menu planning. I like to have a LONG time to work on things so I can try to bargain hunt and accomplish things by spending an hour a night (or less!) working on them.

Here is my first decoration - absolutely adorable fabric flowers! The full set of directions can be found on Going Sew Crazy's blog, but here are my step by step photos:
Costs
Fabric - Free! (I am using only scraps left from my various crafting projects)
Embroidery floss - Free! (leftovers once again)
Beads - $3 from Joann's (20 beads in the pack)

Thursday, March 25, 2010

Birthday Party!

This is the first in a series of posts on my planning process for my daughter's first birthday party. I am so excited to finally have a little one to plan things for. As my friends and family know, I LOVE to plan parties. The theme for my little bug's party is Sesame Street and Elmo. I've spent a lot of time prowling Target, Walmart, AC Moore, Michael's, Joann's and assorted party supply stores trying to find as many personalized details as I can at a reasonable price.

My first project was making the perfect invites to set the stage for the party. As I made all the invitations for my wedding and various other events, I did have many of the supplies already which made making these very inexpensive. I also watched the ads and waited until the cards and paper were all on sale for 40% off. I think it cost roughly $10 for the paper and card supplies and $15 to add the circle cutter and template to my collection of supplies.

Here are the photos:


All of the supplies:
packs of flat cards and envelopes
8x11 paper in primary colors
12x12 paper (only black used)
scissors
Fiskars shape cutter
two sizes of circle punches
BIG glue stick


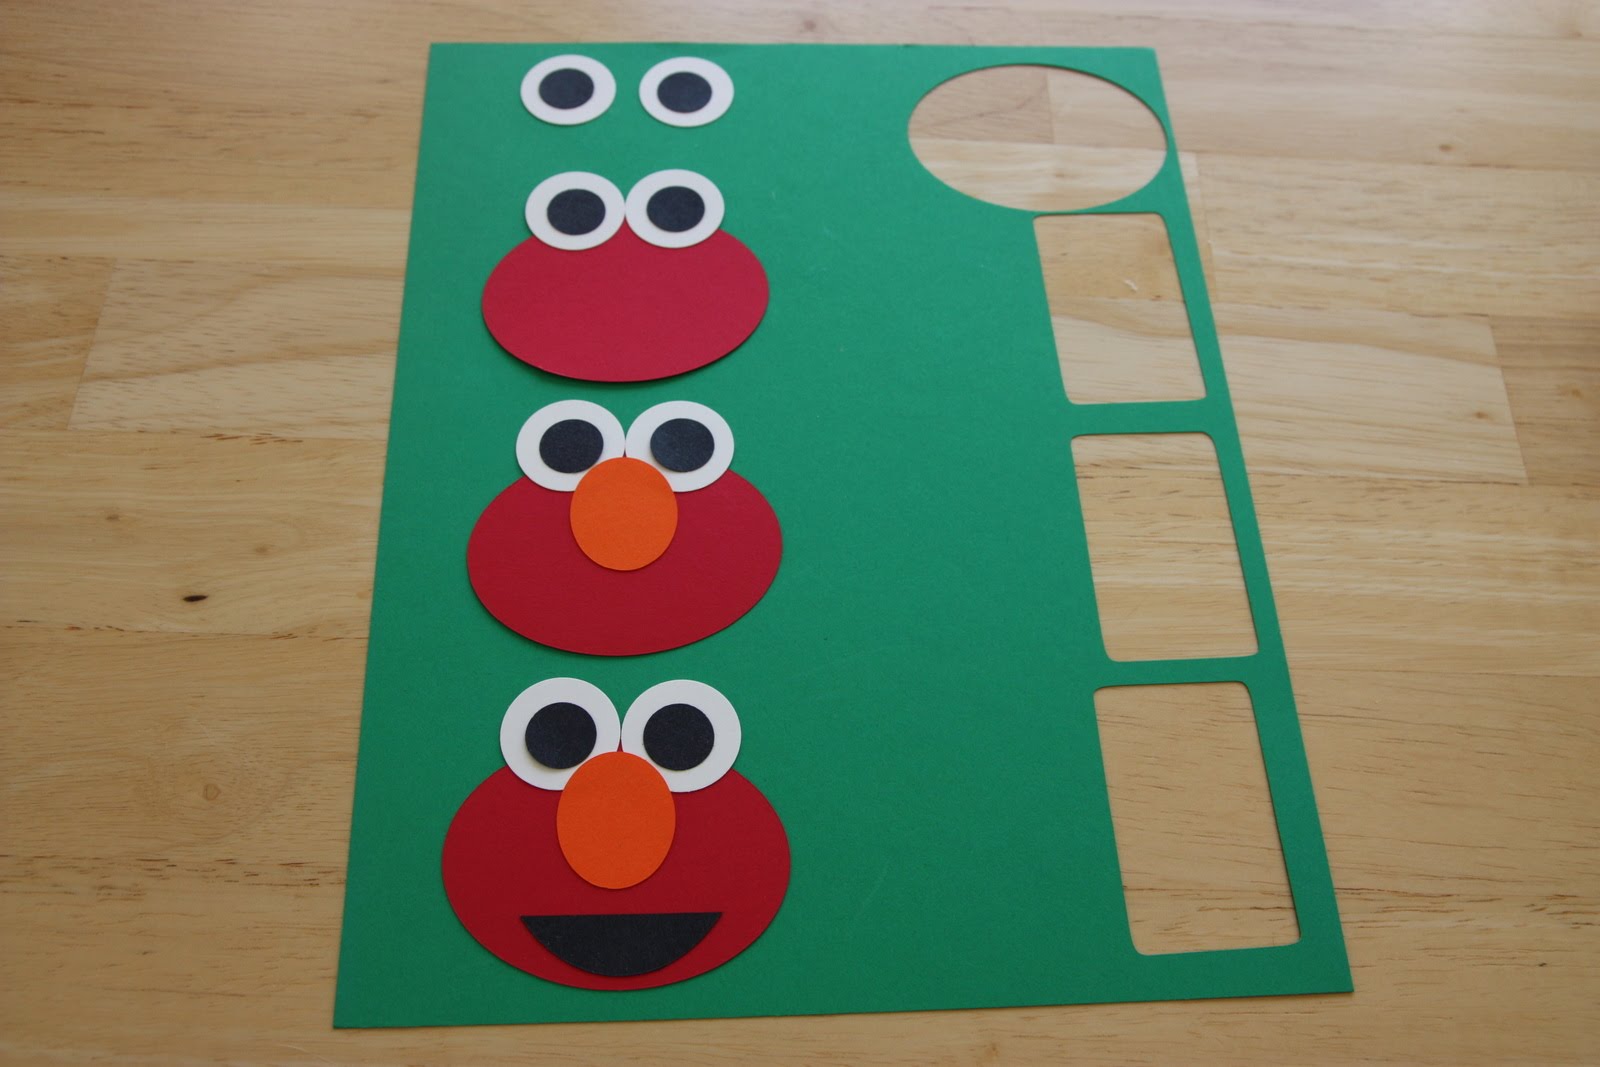
The red and orange paper with the shape cutter and template for Elmo's head and nose


The white and black paper with the punches and circle cutter that I used to make the eyeballs and Elmo's mouth (I cut out an oval and then used a slice from either end to make Elmo's smile)


All of the pieces ready to be assembled!


Elmo comes together!

(Not pictured here, but seen in the final product are the small circles I thought of as an additional decoration which were punched using the smaller circle punch from the scraps of the paper used to make the colorful invitation wording.)


The front of the invitation

(The colors are muted because my husband used a scanner to put this image into the computer and it washed them out a bit)


The back of the invitation with (personal information blurred.)

I was really excited with how these came out. I knew the Elmo was a good representation when I saw the huge smile on my little girl's face the first time she saw them.

More party planning to come in the next few weeks...