Follow Me on Pinterest
Showing posts with label crafts. Show all posts

Tuesday, April 15, 2014

Frozen Party: Making it happen

I wanted to dedicate a separate post to giving lots of tips on how I put together the details for my bug's 5th birthday party. I know Frozen parties are BIG right now and I hope my tips can help save other busy moms some time trying to figure out all the picky details on their own.

Finding Frozen merchandise is not for the weak of heart
Frozen merchandise is nearly impossible to find. I managed to get my bug the pictured Elsa doll/dress set during a random trip to Target. My best advice is to walk through the toy section of Target (I hate Walmart, but did try them too and never found anything) as often as you can. Doing this I managed to snag this gift set, a snow globe wand that plays "Let it Go", and a small Elsa figurine.

Turn portraits and paintings into party decor!
A simple way to decorate at home is to turn pictures that are already hanging into party decor. I covered a large painting that was over the fireplace with an inexpensive plastic tablecloth and paper snowflakes. The tablecloth can be saved and reused for a future party to reduce waste:-)

Hanging decor creates an impressive "centerpiece" when you don't have much room on your table
If you know your theme ahead of time, you can collect items on sale to save money. These lanterns, pom-poms, and hanging twirls were all purchased from Hobby Lobby on sale. The twirls were "Christmas clearance" at 90% off and the other decor were from the wedding section during a 50% off sale. These were hung using the easy to remove tabs from Command.

This falling snow creates a dramatic effect for a small cost
Using invisible thread I strung white pom poms (but you could easily use cotton balls!) and placed them at different heights to give the illusion of falling snow. The larger snowflakes were purchased from the wedding section at Hobby Lobby during a 50% off sale ($5 for 25 snowflakes). To save money, make paper snowflakes or find clearance items after the holidays.

Turn an easy cheese ball recipe into an impressive Olaf replica
The make ahead cheese ball recipe I created was incredibly simple:

  1. Soften two 8oz bars of regular cream cheese and one 8oz bar of reduced fat cream cheese on the counter for a few hours.
  2. Mix all of the softened cream cheese in a large bowl with one packet of ranch dip mix and 4oz of shredded sharp white cheddar. I shred my own cheese because I don't like the consistency of pre-shredded cheese because of the anti-caking agents they add.
  3. Chill the mixture overnight or for several hours until firm.
  4. Create two small balls for feet (I used a Pamper Chef 1 inch cookie scoop), a large and smaller ball for the body, and an oval for his head. I wrapped each piece separately in plastic wrap and then placed them all on a plate and covered again with plastic wrap. Freeze until the morning of your party. 
  5. Right before the party, assemble Olaf. I am going to make a second one for bug's kid party and will post a separate tutorial on Olaf's assembly in a few weeks. 

These cute milk bottles play double duty as a dessert table decoration
I love the way fancy milk bottles look for parties, but hate the cost. I also hate how much milk gets wasted when the kids take them because they look cool, but only drink a few ounces of milk. For these reasons, I decided I wasn't going to make them. Then, I stumbled upon these bud vases on sale at Michael's. They only cost me 40 cents apiece and hold 3-4 oz of milk. Perfect! I cropped a photo of Olaf to just include his face, printed on a regular color printer, and then glued these onto paper straws (from the dollar bins at Target). I glued the black pom poms on with hot glue.

Fun way to display treats
I used this same cupcake stand last year (which my mom purchased from a craft store using a coupon) to display "wisps" for our Brave themed party. The treat this year was hot cocoa muddy buddy mix. Recipe can be found here.

Snowball and snowflake cookies complete a perfectly frosty dessert display
The vanilla meringues were purchased from Trader Joe's ($3.99 for a decent size container) and the cookies were homemade. I purchased snowflake cookie cutters on clearance after the holidays and used my mom's sugar cookie recipe. After reading many blogs for advice to prevent the cookies from spreading, I omitted all baking powder/baking soda from the recipe and made sure to chill the cut dough in the freezer for at least twenty minutes before baking.

I made the cookies ahead of time and stored them (un-frosted) in the freezer until the week of the party. Two days before the party I took the cookies out and used this small batch recipe for royal icing to outline and flood the cookies. The next day I made a second batch to pipe on the details. I kept them stored in an air-tight container until the party.

This impressive, but easy to assemble Frozen cake is a show stopper!
The first step in creating this cake is making all of the snowflakes to embellish the cake. I used a coupon to purchase a small package of Wilton white fondant at 40% off. I used the snowflake cookie cutters for the larger flakes and a set of flower fondant punches from Hobby Lobby for the smaller flakes. I left them out on a cooling rack for 24 hours to harden. I embellished the flakes with larger teal pearls, mini white pearls, and the same royal icing I used to decorate the sugar cookies.

Two days day before the party I used two box mixes (I know, I hate them too. I replaced the oil with melted butter for a more homemade flavor) to bake three layers of cake (6, 8, and 10 inch Wilton pans). They need to cool completely before you frost!

The day before the party I made 2 batches of this buttercream that I piped on using a Wilton 2D tip. Once all the frosting was piped I sprinkled the cake with white sanding sugar for sparkle and added my hardened fondant decorations and extra teal pearls.

I will have more details on Frozen party activities coming up in a few weeks after the bug's friend party, so check back then if you are hungry for more!

Sunday, April 21, 2013

Brave Party: Activities

During my planning for this party I read a handful of blog posts about Brave themed parties in which the hosts planned a "Highland Games" event for the party-goers with archery and caber toss contests. Our kid guests were all under the age of 5 (with the exception of my sister's step-kids who are significantly older) so I wanted the activities to be at their level.

For games, I made my own cut-out archery game with homemade felt arrows to match the party colors and wrote a very simple three step treasure hunt. I originally intended the prize from the treasure hunt to be the party favors (bear stuffed animals), but ran out of time to plan out how to execute it. I just stuck with Brave fruit snacks as the prize at the end. I'm not going to post the clues I wrote for the treasure hunt, but if someone reads this and wants them, please contact me!

Add caption

For crafts I set up my old bedroom with two crafts. One table was set-up with string, wooden beads, multi-colored plastic beads, and plastic bear claws to make bear claw necklaces. I didn't realize until it was too late that the string I bought frayed easily making the necklaces difficult for the little ones to string:-( The other table was set up with cardboard crowns, markers, crayons, glue, glitter, gems, and Brave stickers to make crowns. The kids really seemed to enjoy decorating themselves (and their parents) with stickers and playing with all the gems!

Saturday, March 30, 2013

Photo Tutorial: Ribbon Curls

I've been less active with blogging this past week because, well, I've been exhausted! I'm usually part time (because our office is too small for 3 full time MDs and 2 full time NPs), but bump up my hours whenever another provider is out of the office. Due to Passover, two of the providers have been out so I spent the first half of the week seeing 3 panels of patients (which added up to 15 patients during the 3 1/2 hour span I was in the office on Monday morning!), doing all my usual chores, planning my Easter dishes, AND gearing up for bug's big 4th birthday bash in two weeks! It might continue to be slower around here until after the party, but I'll do my best to stay connected.

One of the projects for bug's party was inspired by this blogger's post on Disney Princess ribbon headbands. She gives a ribbon curling tutorial, but when I followed her directions the curls were a bit floppy and started to lose their shape. I did some research and this is the method I used instead. I will post a tutorial on my ribbon figures once I finish them all up!

Supplies: Spray starch, grosgrain ribbon (any width you want to use), clothespins, pencils or dowels, scissors, a towel , and a baking sheet
Preheat your oven to 250 degrees while you get the ribbon ready.
Start by pinning one end of your ribbon to the top of the pencil.
Wrap the ribbon around the pencil keeping the ribbon wraps tightly next to each other, but not overlapping.
When you reach the end of the pencil, cut the ribbon and pin the end. Wrap as many pieces as you want/need. I wrap the entire pencil and trim to the lengths I need after it's curled.
Line up the pencils on the towel and spray each side lightly with the spray starch.
Line up on the baking sheet and bake in preheated oven for 25 minutes.
Let cool completely (at least 20 minutes) before unpinning and the curls should slide right off the pencil and be ready for use!

Thursday, February 28, 2013

Makin' Memories

Pinning creative ways to capture memories seems to be one of the mom things to do these days. I have a board with over 30 (I just checked my pin count and it is precisely 38) such ideas. I just went through one of the "ask your kid 20 questions about themselves each birthday" pins in prep for my bug's 4th birthday and it was a RIOT. The craft I am posting today is the first handprint craft we did as a family of four (cue sappy awwww! sound effects) back in December. I'm just getting to posting it now because it took me this long to finish the project...I'm good, but I'm not THAT good. Anyway, I present to you...

Family Footprints - Winter Version

Upside-down footprints make cute and cuddly penguins!
My inspiration came from this blogger's post. Instead of doing both feet, we each did one footprint and lined them up side by side. This was a fun, silly craft to do together as we took turns painting each other's feet with one of those foam brushes and then had to limp/be carried to the bathroom to clean up. 

After the initial footprints were done, I set the paper (poster board) aside to dry and didn't actually get to painting on the faces for awhile. After 4-6 weeks of procrastination, I got out the paints and let the bug pick out which colors she wanted me to use for each penguin's hat and scarf. Another month (or more) passed before I picked up a simple, inexpensive frame from the craft store to keep our memory safe. 

I hope to make something similar for each season so we can display them in the girls' playroom someday.

Sunday, December 16, 2012

Tis the season...


If you hadn't guessed by my prolonged silence after the last pregnancy related post...our second baby was born! Although she came 5 days later than my due date and I had the joy of two days of non-productive contractions, the labor and delivery were a breeze once everything got going. My recovery time was minimal and we all settled into a routine as a family of four without issue.

As I sit here typing this (almost exactly 6 weeks following her birth), I am feeling great. I've been back to work for 2 weeks, am 2 pounds below my pre-pregnancy weight, and am in the midst of my usual holiday baking/cooking/crafting craziness.

There is another thing that is new to our house this year for Christmas - we have our very own Elf! "Sugar" has been here keeping tabs on our little bug and reminding her to be a good girl for Santa. Sugar has been leaving the bug special treats each day to count down the 12 days until Christmas. Below you can see what we've been up to so far...
To kick-off, Sugar and her friends decorated bug's room with snowflakes and paper chains

12 - The first day featured a cup with hot cocoa mix and two new Christmas books

11 - Sugar left all the ingredients to make tree shaped pizzas for dinner
10 - Everything to make cinnamon ornaments
I didn't get a photo of Day 9 in time, but Sugar left her lots of silly dress up items to play with and pose for a silly photo shoot. Props included a singing tie, multiple headbands with bouncy Santas or snowmen, bead necklaces, and feather boas.

Sunday, March 4, 2012

Ribbon topiary

These are still a work in progress as I haven't finished the bases they will be "planted" in yet, but they are fun enough to share.

These were a very cheap, but time consuming project:

2 styrofoam cones - $2.00 (dollar tree)
Assorted ribbon - $8.00 (various craft stores)
Pins - $1.00 (dollar tree)

Each took about 5 hours total to make, but it wasn't tedious as I worked about 1-2 hours at a time while watching tv or movies after the bug went to bed.

Monday, January 31, 2011

The winner and more!

Thanks to everyone who participated in the voting for Maddie's second birthday party - the winning theme is Cute as a Bug!

Now that I finally have my theme, I'm ready to start the slow process of working on all of my homemade crafts - decorations, invitations, and cake/menu planning. I like to have a LONG time to work on things so I can try to bargain hunt and accomplish things by spending an hour a night (or less!) working on them.

Here is my first decoration - absolutely adorable fabric flowers! The full set of directions can be found on Going Sew Crazy's blog, but here are my step by step photos:
Costs
Fabric - Free! (I am using only scraps left from my various crafting projects)
Embroidery floss - Free! (leftovers once again)
Beads - $3 from Joann's (20 beads in the pack)

Monday, January 24, 2011

Sewing fun

Months ago I ran across a website with directions on how to make "pillowcase dresses" for little girls. I've been wanting to try it out for my little bug, but just didn't have enough free time. Today I had a rare afternoon free as my attending took the day off. After spending a solid two hours in the kitchen cooking and finding that the bug was STILL napping, I figured this was my chance.

I don't have any fancy vintage pillowcases, so I just purchased a simple, cheap solid color pillow case from Walmart (2 pack for $5.50). I also happen to be a bargain bin shopper and have an entire box full of fabric bindings and rick rack embellishments that I purchased from a craft shop for 25 cents a pack that I used to fancy it up. The directions I used can be found here.

Cost breakdown
$2.25 - one pillowcase
$0.25 - white binding
$0.25 - white rick rack
$1.50 - elastic (used only 1/5 of the pack)
(+ white and teal thread from my sewing accessories)
_______________
$3.75!!

Thursday, March 25, 2010

Birthday Party!

This is the first in a series of posts on my planning process for my daughter's first birthday party. I am so excited to finally have a little one to plan things for. As my friends and family know, I LOVE to plan parties. The theme for my little bug's party is Sesame Street and Elmo. I've spent a lot of time prowling Target, Walmart, AC Moore, Michael's, Joann's and assorted party supply stores trying to find as many personalized details as I can at a reasonable price.

My first project was making the perfect invites to set the stage for the party. As I made all the invitations for my wedding and various other events, I did have many of the supplies already which made making these very inexpensive. I also watched the ads and waited until the cards and paper were all on sale for 40% off. I think it cost roughly $10 for the paper and card supplies and $15 to add the circle cutter and template to my collection of supplies.

Here are the photos:


All of the supplies:
packs of flat cards and envelopes
8x11 paper in primary colors
12x12 paper (only black used)
scissors
Fiskars shape cutter
two sizes of circle punches
BIG glue stick


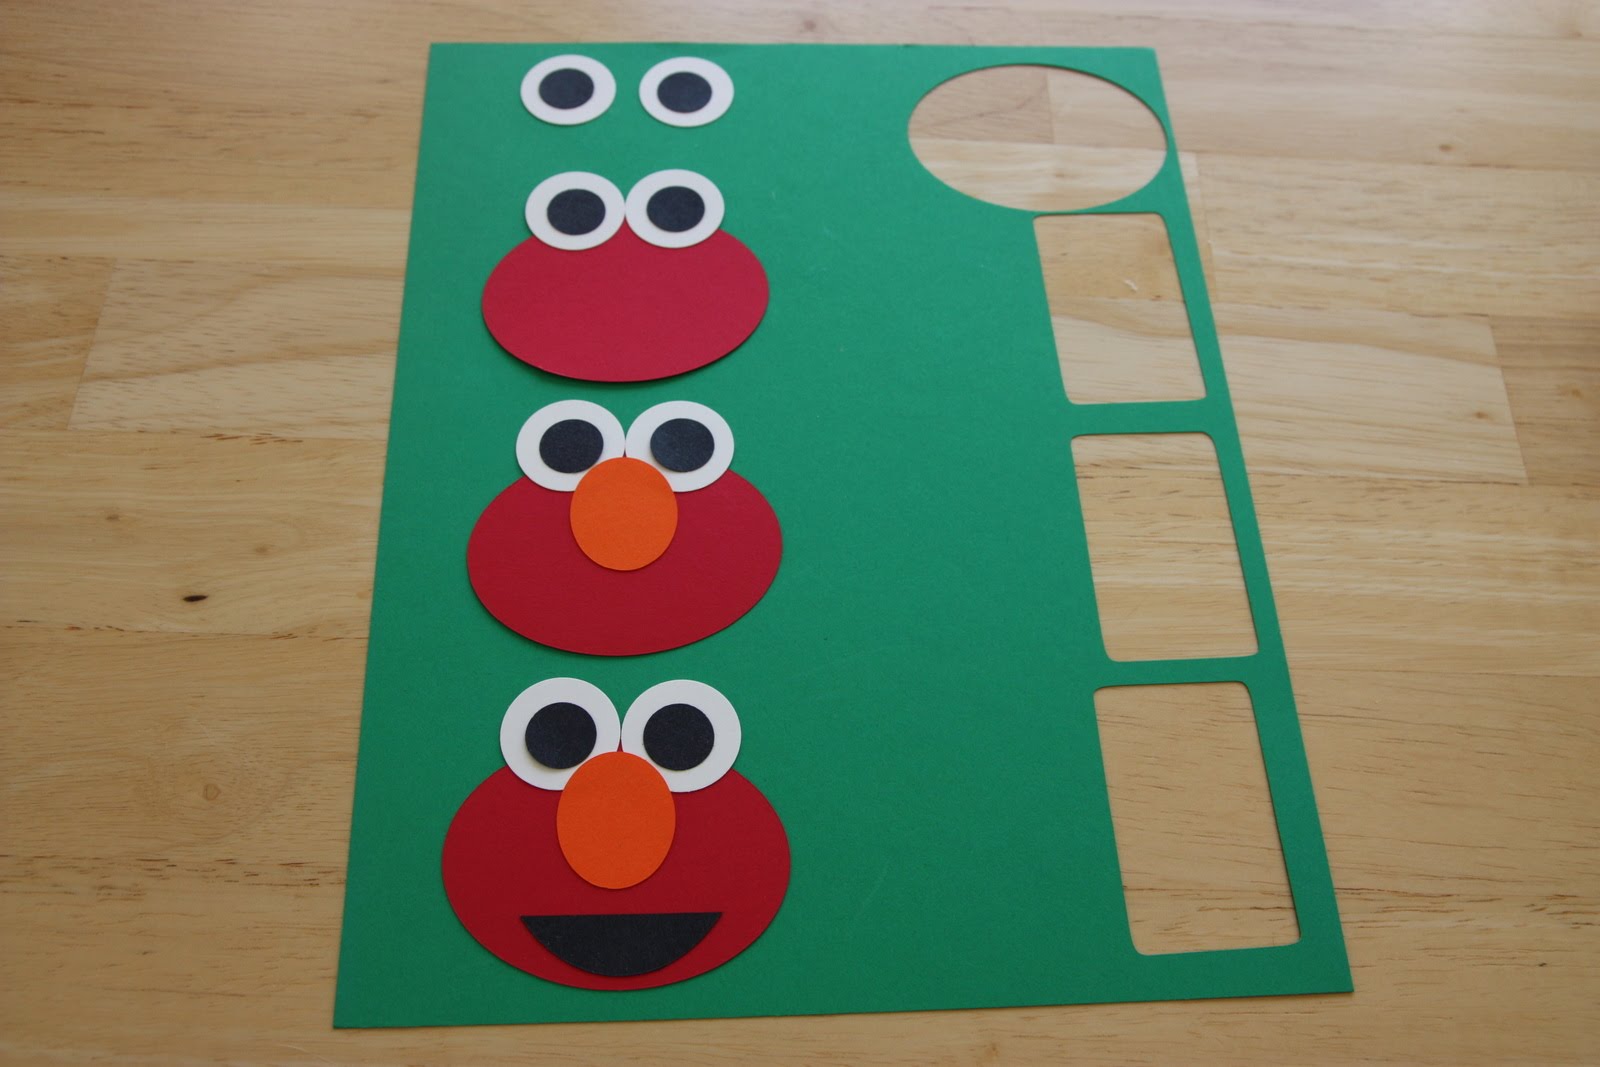
The red and orange paper with the shape cutter and template for Elmo's head and nose


The white and black paper with the punches and circle cutter that I used to make the eyeballs and Elmo's mouth (I cut out an oval and then used a slice from either end to make Elmo's smile)


All of the pieces ready to be assembled!


Elmo comes together!

(Not pictured here, but seen in the final product are the small circles I thought of as an additional decoration which were punched using the smaller circle punch from the scraps of the paper used to make the colorful invitation wording.)


The front of the invitation

(The colors are muted because my husband used a scanner to put this image into the computer and it washed them out a bit)


The back of the invitation with (personal information blurred.)

I was really excited with how these came out. I knew the Elmo was a good representation when I saw the huge smile on my little girl's face the first time she saw them.

More party planning to come in the next few weeks...