Follow Me on Pinterest
Showing posts with label disney. Show all posts

Tuesday, April 15, 2014

Frozen Party: Making it happen

I wanted to dedicate a separate post to giving lots of tips on how I put together the details for my bug's 5th birthday party. I know Frozen parties are BIG right now and I hope my tips can help save other busy moms some time trying to figure out all the picky details on their own.

Finding Frozen merchandise is not for the weak of heart
Frozen merchandise is nearly impossible to find. I managed to get my bug the pictured Elsa doll/dress set during a random trip to Target. My best advice is to walk through the toy section of Target (I hate Walmart, but did try them too and never found anything) as often as you can. Doing this I managed to snag this gift set, a snow globe wand that plays "Let it Go", and a small Elsa figurine.

Turn portraits and paintings into party decor!
A simple way to decorate at home is to turn pictures that are already hanging into party decor. I covered a large painting that was over the fireplace with an inexpensive plastic tablecloth and paper snowflakes. The tablecloth can be saved and reused for a future party to reduce waste:-)

Hanging decor creates an impressive "centerpiece" when you don't have much room on your table
If you know your theme ahead of time, you can collect items on sale to save money. These lanterns, pom-poms, and hanging twirls were all purchased from Hobby Lobby on sale. The twirls were "Christmas clearance" at 90% off and the other decor were from the wedding section during a 50% off sale. These were hung using the easy to remove tabs from Command.

This falling snow creates a dramatic effect for a small cost
Using invisible thread I strung white pom poms (but you could easily use cotton balls!) and placed them at different heights to give the illusion of falling snow. The larger snowflakes were purchased from the wedding section at Hobby Lobby during a 50% off sale ($5 for 25 snowflakes). To save money, make paper snowflakes or find clearance items after the holidays.

Turn an easy cheese ball recipe into an impressive Olaf replica
The make ahead cheese ball recipe I created was incredibly simple:

  1. Soften two 8oz bars of regular cream cheese and one 8oz bar of reduced fat cream cheese on the counter for a few hours.
  2. Mix all of the softened cream cheese in a large bowl with one packet of ranch dip mix and 4oz of shredded sharp white cheddar. I shred my own cheese because I don't like the consistency of pre-shredded cheese because of the anti-caking agents they add.
  3. Chill the mixture overnight or for several hours until firm.
  4. Create two small balls for feet (I used a Pamper Chef 1 inch cookie scoop), a large and smaller ball for the body, and an oval for his head. I wrapped each piece separately in plastic wrap and then placed them all on a plate and covered again with plastic wrap. Freeze until the morning of your party. 
  5. Right before the party, assemble Olaf. I am going to make a second one for bug's kid party and will post a separate tutorial on Olaf's assembly in a few weeks. 

These cute milk bottles play double duty as a dessert table decoration
I love the way fancy milk bottles look for parties, but hate the cost. I also hate how much milk gets wasted when the kids take them because they look cool, but only drink a few ounces of milk. For these reasons, I decided I wasn't going to make them. Then, I stumbled upon these bud vases on sale at Michael's. They only cost me 40 cents apiece and hold 3-4 oz of milk. Perfect! I cropped a photo of Olaf to just include his face, printed on a regular color printer, and then glued these onto paper straws (from the dollar bins at Target). I glued the black pom poms on with hot glue.

Fun way to display treats
I used this same cupcake stand last year (which my mom purchased from a craft store using a coupon) to display "wisps" for our Brave themed party. The treat this year was hot cocoa muddy buddy mix. Recipe can be found here.

Snowball and snowflake cookies complete a perfectly frosty dessert display
The vanilla meringues were purchased from Trader Joe's ($3.99 for a decent size container) and the cookies were homemade. I purchased snowflake cookie cutters on clearance after the holidays and used my mom's sugar cookie recipe. After reading many blogs for advice to prevent the cookies from spreading, I omitted all baking powder/baking soda from the recipe and made sure to chill the cut dough in the freezer for at least twenty minutes before baking.

I made the cookies ahead of time and stored them (un-frosted) in the freezer until the week of the party. Two days before the party I took the cookies out and used this small batch recipe for royal icing to outline and flood the cookies. The next day I made a second batch to pipe on the details. I kept them stored in an air-tight container until the party.

This impressive, but easy to assemble Frozen cake is a show stopper!
The first step in creating this cake is making all of the snowflakes to embellish the cake. I used a coupon to purchase a small package of Wilton white fondant at 40% off. I used the snowflake cookie cutters for the larger flakes and a set of flower fondant punches from Hobby Lobby for the smaller flakes. I left them out on a cooling rack for 24 hours to harden. I embellished the flakes with larger teal pearls, mini white pearls, and the same royal icing I used to decorate the sugar cookies.

Two days day before the party I used two box mixes (I know, I hate them too. I replaced the oil with melted butter for a more homemade flavor) to bake three layers of cake (6, 8, and 10 inch Wilton pans). They need to cool completely before you frost!

The day before the party I made 2 batches of this buttercream that I piped on using a Wilton 2D tip. Once all the frosting was piped I sprinkled the cake with white sanding sugar for sparkle and added my hardened fondant decorations and extra teal pearls.

I will have more details on Frozen party activities coming up in a few weeks after the bug's friend party, so check back then if you are hungry for more!

Sunday, April 13, 2014

Frozen Party

My bug is five (FIVE!) years old now. I'll spare you a bunch of cheesy comments about "time flying" and feeling like it was "just yesterday that she was born". The truth is that some days being her mom have been amazing and others have been really, really hard. Even on our worst days, I love her with all of my heart. This year I had a blast planning a Frozen themed birthday party to celebrate what a special little girl she is to me.

Thanks to the internet and Pinterest I've been researching ideas for her party for months. I thought it would be fun this year to share "inspiration" versus "actual" photos of our party details. I'll fill in a few more details and post larger photos in a separate post later this week.


I really wanted to share these photos early, check back later this week for tutorials, recipes, etc! As always, I hope my work inspires someone else out there!

Saturday, March 22, 2014

Frozen Day 4 - Tutu photo tutorial!


So when I started my "5 days of Frozen" I intended it to be five consecutive days. Seriously, I have no idea how I thought that was going to happen. Life is just too crazy for a working mama with two kids under the age of five to really expect enough free time FIVE DAYS IN A ROW to accomplish anything more than keeping everyone alive. In my defense, I did create the two pretty sweet Anna and Elsa tutus you're about to read all about. They are actually really easy to make and I finished each one with just a few hours of mindless work after the girls went to bed.


Without further ado, here is my photo tutorial...

Step 1: Measure the waist of your birthday girl/princess/monster child. I was ready to start my little one's tutu when she was napping, so I based her waist measurement on a pair of pants I knew fit her well. Whatever your measurement is, subtract 1-2 inches (1 for a smaller tutu, 2 for a bigger one) before cutting your elastic. You do this because the elastic gets stretched as you tie the tulle. Trust me. If you don't subtract some length, the tutu won't fit!

Step 2: Overlap the ends of your elastic by ~1 inch and sew. You can use a machine or do it by hand like I did. I like to fully secure the elastic ends by sewing a square.

Step 3: Measure and cut your tulle. I used 25 yard rolls of tulle in different colors from Hobby Lobby. The amount you will need depends on how full you want to make your tutu. For my older daughter I used two full rolls and about 1/2 of a roll of glitter tulle added as an accent. I measured by using a rigid mailing envelope to wrap a large amount of tulle around and then cut one end to create many strips with one cut. For the bigger tutu I wrapped the long way around the envelope and the opposite for the smaller one (I was making the smaller one in this tutorial).

Step 4: Start tying the tulle. Fold the tulle in half and create a loop. Place the loop behind the elastic. Pull the loose ends up and through the loop. Pull just until the loop is wrapped around the elastic with the loose ends pointing down. How tight you make the knot (and how close together you squeeze the pieces of tulle) will determine how full your tutu is at the end.

Step 5: Keep tying! Repeat step 4 until the entire elastic band is covered.

Step 6: Once the entire band is covered, you can add more tulle on top of the first row if you want to make it fuller. This was really hard to capture a photo of, but basically you just add another loop between pre-existing loops and don't pull it as tight allowing it to lay on top of your base layer of tulle. I also did this on my Elsa tutu with the glitter tulle that I added at the end.

Step 7: Add on any embellishments you want! I didn't add anything to the little bear's tutu because I didn't want her to be enticed to pull it apart, but I did sew on some snowflake ribbon I purchased after Christmas for my bug's tutu. Other add-on ideas include a big bow, ribbons, or sequins.

FYI: The shirts were made by a local small business RyleighRoo

Thursday, March 13, 2014

Frozen Birthday Party Sneak Peek!

As per my usual routine I start hoarding birthday party supplies as soon as we decide on a theme. Although Maddie's birthday falls in the spring, I've had all winter to look for snowflakes and glittery icicle items. I was even able to get some great deals after Christmas and will be able to take advantage of my father-in-law's extensive Christmas lawn decoration collection to set the scene.

Here are the supplies I will be working with over the next month to put together a Frozen celebration worthy of a princess...


Can you guess what I'm doing with all these supplies? Or what items will never actually make it to the party?


Here's a sneak peek at my custom made invitation...

For the first time in forrrrrever (good luck getting it out of your head now...) we're planning a separate adult family party and a kid/school friends party. Double planning, double the fun? We will see!

Wednesday, March 12, 2014

Love is an open door

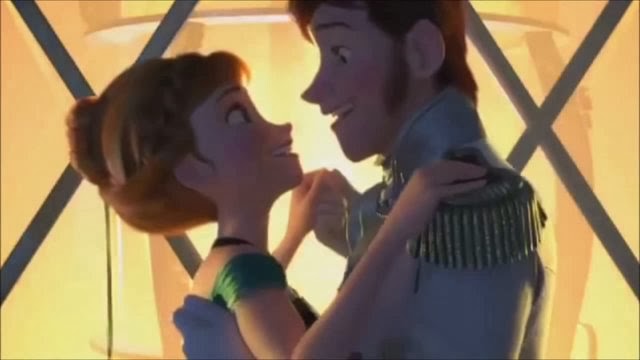
The sentiment of this song is actually really sweet and not too sappy, but it's still not what REAL love is all about. I will say in Disney's defense that it might be difficult to make "I love you even when you smell like baby vomit" melodically appealing though. After 15+ years of dating, 7 years of marriage, 2 cats, and 2 children here is what I think love is really all about.


Love is being there. You might not be showered or wearing "real clothes". You might be older or heavier than you were when you first met. You might be suffering from mental, physical, or emotional stress that has altered how you even see yourself. But when you really love someone you are still there. Day in and day out. By their side. Wrinkles, graying hair, ill-fitting pants and all.

Love is laughing together. In your younger days the laughter might have been over a comedy at the movies or while sharing stories of childhood adventures. Now it's often over who changes the most poopy diapers (me, hands down) or the latest ridiculous thing the four year old said ("Your private parts are nice, mommy" on walking in on me getting out of the shower this morning...). The point is, keep smiling, laughing, and finding joy in things together.

Love is growing together. We are all always changing. For most of us the changes are slow, subtle, and happen so indistinctly that we don't realize we've even changed until we look back at where we were and see how far we've come. Truly loving someone means making this journey with them rather than away from them.

Love is messy. It's not a fairy tale that starts at a ball and ends with happily ever after. It's ups and downs. Love can fill you with such happiness that you feel like you are literally about to burst. And sometimes love feels like the smallest flicker of light in the pit of your stomach on the brink of snuffing out completely. Even on those darkest days true love is there, part of you, just waiting for you to take a deep breath and feed the flame.

Love is accepting yourself as someone worth loving. You can have SO MUCH love for your partner, but if you don't value the role you play in the love relationship things will never be as good as they could be. This most crucial point is where I personally have struggled the most (and still struggle at times). Put simply, love yourself so others can too!

So there you have it, Disney. Love is getting old and frumpy, changing poopy diapers, fighting the darkness within, and a whole lot of self-reflection. Good luck turning that into a musical ballad...


Sunday, March 9, 2014

Five Days of Frozen

My family is officially Frozen obsessed. The movie crept into our lives before it even debuted on the big screen. Merchandise was prominently on display throughout the Disney Parks back in the beginning of November before the movie came out. We didn't stock up on toys (not knowing how in demand they would be in just a few short weeks), but my bug happened to fall in love with the Anna gown when we took her shopping for a princess dress in Downtown Disney.

"Princess pose" in Downtown Disney after buying her new dress
I was a bit skeptical about letting her buy the dress of an unknown princess from an unseen movie, but it fit all the major bug criteria - spin-y skirt, sparkles, and no itchy crinoline/tulle on her skin - so we went ahead and bought it. If only we knew how obsessed she would become, we probably would have splurged and bought her the Elsa dress too.

After her full princess makeover
Which brings me to the day we saw the movie. We I cried, laughed, and thoroughly enjoyed the whole thing. When we walked out of the theater my bug declared that she was having a Frozen themed birthday party. My husband downloaded the soundtrack as soon as we got home and it's been playing non-stop ever since. No joke, we've been living in a house of Frozen worship for over three months now. 

Bug knows all the lyrics to "Let it Go" (amazing song), "Love is an Open Door" (fun song), and "Frozen Heart" (somewhat disturbing song to hear a four year old sing/chant). Baby bear dances and giggles as soon as she hears the opening bars of "Let it Go". I go to bed each night planning Frozen themed party treats and ways to make decorations that look like snow.

If there was a word stronger than OBSESSED, you could use it to describe us.

As it's always on my mind anyway, I've decided to spend the next week making Frozen themed posts. I might even give some sneak peaks into my party planning. 

Check back soon for more!

Thursday, May 2, 2013

Brave Party: Details, details, details!

I have to admit I have been struggling with getting the rest of my party details up here. This isn't yet classified on the DSM, but I think I am suffering from my annual case of post-party depression. Each year I spend months and months planning and prepping for bug's birthday party and then I invariably end up disappointed when it's over. The day of the party things get too crazy and I don't get to properly display, enjoy, or photograph all of the projects I obsessed over.

When I settle down to share the party details on here, I realize how much is missing from the photos. Then I get sad. So silly, but so true. I think I am finally recovering because I had a new event to plan (more on that soon). Anyway, here are the photos I have of all the extra details I haven't yet posted about.

I made the frilly tablecloth decoration I pinned from here and decorated the TV stand with Brave plush toys from the Disney Store

Birthday banner made using the Cricut Pretty Pennants cartridge.
I also created a very cute bunting using the Cricut and some bias tape that decorated the stairs leading into the party, but we have no pictures. Maybe I'll post a separate tutorial for that because it was so cute and so easy!

Birthdays aren't complete without balloons! We clustered bunches of 3-4 balloons and tied them up around the party space

I've been planning this party long enough that I picked up the garland and the fancy glittery stars hanging on the light from Target after christmas for literally pennies.

I dennoted all the "party rooms" by making decorative banners over each doorway. The doors were also labeled with fun Brave themed references such as, "Queen Elinor's Closet" for dress-up, "The Crafty Carver" for arts and crafts, and "Mor'du's lair - Do Not Enter" for my messy supply room. 

View of the decorations from the downstairs looking up.
My husband's uncle works for a bottling plant, so he gets me empty plastic bottles and any color cap I want to make these with any drink I want in them. Fun!

I included this photo to show the fun "Conversation with the Birthday Girl" I printed out (you can see it right next to the cellphone held by my cousin with the gorgeous curly red hair). I stole the questions from this blog.
 

Sunday, April 21, 2013

Brave Party: Activities

During my planning for this party I read a handful of blog posts about Brave themed parties in which the hosts planned a "Highland Games" event for the party-goers with archery and caber toss contests. Our kid guests were all under the age of 5 (with the exception of my sister's step-kids who are significantly older) so I wanted the activities to be at their level.

For games, I made my own cut-out archery game with homemade felt arrows to match the party colors and wrote a very simple three step treasure hunt. I originally intended the prize from the treasure hunt to be the party favors (bear stuffed animals), but ran out of time to plan out how to execute it. I just stuck with Brave fruit snacks as the prize at the end. I'm not going to post the clues I wrote for the treasure hunt, but if someone reads this and wants them, please contact me!

Add caption

For crafts I set up my old bedroom with two crafts. One table was set-up with string, wooden beads, multi-colored plastic beads, and plastic bear claws to make bear claw necklaces. I didn't realize until it was too late that the string I bought frayed easily making the necklaces difficult for the little ones to string:-( The other table was set up with cardboard crowns, markers, crayons, glue, glitter, gems, and Brave stickers to make crowns. The kids really seemed to enjoy decorating themselves (and their parents) with stickers and playing with all the gems!

Wednesday, April 17, 2013

Brave Party: Getting In Character

This begins my series on planning and throwing my daughter's Brave themed birthday party. I will preface each post by reminding readers that the day of the party was SO hectic (we arrived to the party location late due to a mix-up with the balloons and had a cranky teething 5 month old that only wanted mommy or daddy) that many photos were missed. I will describe any additional details that I don't specifically have photos of.

To set the stage, the party was hosted at my parent's house. They are currently in Florida so I was able to use their house completely at my whim - taking down pictures, putting up decorations days in advance, etc. I set up their living room as a general play area with kid-sized tables for eating, the dining room and kitchen as food stations, my sister's old bedroom as a dress-up room, my old bedroom as a craft room, and my parent's bedroom as my storage room.

Starting at top left and going counterclockwise: Baby bear in her crocheted bear hat, Me in my Brave tapestry shirt, Birthday Girl in her Merida dress, Merida ribbon headbands, and Bear ear headbands.

One of the things I really wanted to set the mood for the party were costumes and accessories to help the guests really feel like they were part of the movie.

  • This started with finding a Merida costume for the birthday girl. I had my sister check the official stores in Downtown Disney for the highest quality dress possible, but they were not yet selling a Merida dress. I settled for one from the Disney Store online. It is not nearly as nice as the Cinderella one we purchased in the Magic Kingdom, but is far better than the cheap ones they sell at the toy stores.
  • Bug's favorite part of Brave is when the little brothers turn into bears. I knew I had to find a way to turn her little sister into a bear too. A quick search on pinterest brought up a very cute Brave inspired knit hat. I forwarded the photo to a friend whose cousin crochets and within days she produced the adorable hat you see above. 
  • During one of my many virtual shopping experiences online at the Disney Store I stumbled across a woman's shirt depicting the family tapestry (on sale of course!) and had to buy it for myself so I could be in character as well.
To allow the guests to get into the spirit of the movie I set up my sister's old bedroom as "Queen Elinor's Closet" and filled it with accessories... 
  • Keeping with the bear theme, I created a bunch of headbands with bear ears for guests to wear at the party. I purchased the purple headbands (how lucky that the only color available fit my color scheme perfectly!) for less than fifty cents apiece at Party City and made the ears out of black and gray felt. I loosely based them on this tutorial I used last year to make Mickey ears.
  • The Merida headbands were a project I couldn't help making after I found this tutorial on pinterest. I used her ideas, but decided to make Merida's fancy dress instead of the casual dress featured in her directions. If I ever get around to it, I will post my own tutorial.
  • Not pictured: I set up my sister's old desk with piles of Brave temporary tattoos and water/washcloths to apply them. I used my sister's old dresser to lay out all of the headbands I made. I also put out various beaded necklaces and plastic rings with a few handheld mirrors for the kids to dress up and check themselves out.