Follow Me on Pinterest
Showing posts with label baking. Show all posts

Tuesday, April 15, 2014

Frozen Party: Making it happen

I wanted to dedicate a separate post to giving lots of tips on how I put together the details for my bug's 5th birthday party. I know Frozen parties are BIG right now and I hope my tips can help save other busy moms some time trying to figure out all the picky details on their own.

Finding Frozen merchandise is not for the weak of heart
Frozen merchandise is nearly impossible to find. I managed to get my bug the pictured Elsa doll/dress set during a random trip to Target. My best advice is to walk through the toy section of Target (I hate Walmart, but did try them too and never found anything) as often as you can. Doing this I managed to snag this gift set, a snow globe wand that plays "Let it Go", and a small Elsa figurine.

Turn portraits and paintings into party decor!
A simple way to decorate at home is to turn pictures that are already hanging into party decor. I covered a large painting that was over the fireplace with an inexpensive plastic tablecloth and paper snowflakes. The tablecloth can be saved and reused for a future party to reduce waste:-)

Hanging decor creates an impressive "centerpiece" when you don't have much room on your table
If you know your theme ahead of time, you can collect items on sale to save money. These lanterns, pom-poms, and hanging twirls were all purchased from Hobby Lobby on sale. The twirls were "Christmas clearance" at 90% off and the other decor were from the wedding section during a 50% off sale. These were hung using the easy to remove tabs from Command.

This falling snow creates a dramatic effect for a small cost
Using invisible thread I strung white pom poms (but you could easily use cotton balls!) and placed them at different heights to give the illusion of falling snow. The larger snowflakes were purchased from the wedding section at Hobby Lobby during a 50% off sale ($5 for 25 snowflakes). To save money, make paper snowflakes or find clearance items after the holidays.

Turn an easy cheese ball recipe into an impressive Olaf replica
The make ahead cheese ball recipe I created was incredibly simple:

  1. Soften two 8oz bars of regular cream cheese and one 8oz bar of reduced fat cream cheese on the counter for a few hours.
  2. Mix all of the softened cream cheese in a large bowl with one packet of ranch dip mix and 4oz of shredded sharp white cheddar. I shred my own cheese because I don't like the consistency of pre-shredded cheese because of the anti-caking agents they add.
  3. Chill the mixture overnight or for several hours until firm.
  4. Create two small balls for feet (I used a Pamper Chef 1 inch cookie scoop), a large and smaller ball for the body, and an oval for his head. I wrapped each piece separately in plastic wrap and then placed them all on a plate and covered again with plastic wrap. Freeze until the morning of your party. 
  5. Right before the party, assemble Olaf. I am going to make a second one for bug's kid party and will post a separate tutorial on Olaf's assembly in a few weeks. 

These cute milk bottles play double duty as a dessert table decoration
I love the way fancy milk bottles look for parties, but hate the cost. I also hate how much milk gets wasted when the kids take them because they look cool, but only drink a few ounces of milk. For these reasons, I decided I wasn't going to make them. Then, I stumbled upon these bud vases on sale at Michael's. They only cost me 40 cents apiece and hold 3-4 oz of milk. Perfect! I cropped a photo of Olaf to just include his face, printed on a regular color printer, and then glued these onto paper straws (from the dollar bins at Target). I glued the black pom poms on with hot glue.

Fun way to display treats
I used this same cupcake stand last year (which my mom purchased from a craft store using a coupon) to display "wisps" for our Brave themed party. The treat this year was hot cocoa muddy buddy mix. Recipe can be found here.

Snowball and snowflake cookies complete a perfectly frosty dessert display
The vanilla meringues were purchased from Trader Joe's ($3.99 for a decent size container) and the cookies were homemade. I purchased snowflake cookie cutters on clearance after the holidays and used my mom's sugar cookie recipe. After reading many blogs for advice to prevent the cookies from spreading, I omitted all baking powder/baking soda from the recipe and made sure to chill the cut dough in the freezer for at least twenty minutes before baking.

I made the cookies ahead of time and stored them (un-frosted) in the freezer until the week of the party. Two days before the party I took the cookies out and used this small batch recipe for royal icing to outline and flood the cookies. The next day I made a second batch to pipe on the details. I kept them stored in an air-tight container until the party.

This impressive, but easy to assemble Frozen cake is a show stopper!
The first step in creating this cake is making all of the snowflakes to embellish the cake. I used a coupon to purchase a small package of Wilton white fondant at 40% off. I used the snowflake cookie cutters for the larger flakes and a set of flower fondant punches from Hobby Lobby for the smaller flakes. I left them out on a cooling rack for 24 hours to harden. I embellished the flakes with larger teal pearls, mini white pearls, and the same royal icing I used to decorate the sugar cookies.

Two days day before the party I used two box mixes (I know, I hate them too. I replaced the oil with melted butter for a more homemade flavor) to bake three layers of cake (6, 8, and 10 inch Wilton pans). They need to cool completely before you frost!

The day before the party I made 2 batches of this buttercream that I piped on using a Wilton 2D tip. Once all the frosting was piped I sprinkled the cake with white sanding sugar for sparkle and added my hardened fondant decorations and extra teal pearls.

I will have more details on Frozen party activities coming up in a few weeks after the bug's friend party, so check back then if you are hungry for more!

Tuesday, January 14, 2014

Iced Coffee Cupcakes

No, I haven't given up on Weight Watchers already. It just so happens that January is an incredibly busy month for birthdays among my family, friends, and coworkers. Diet or no diet, cupcakes are kinda my thing when it comes to celebrating someone's birth. Don't worry, I ate light all day yesterday so I could test out the frosting and make sure I had the perfect blend of flavors:-)

The cupcakes I'm blogging today are for someone very special at my practice -  my office manager and good friend. She has really been my lifeline since I joined the group just over two years ago. There have been quite a few bumps along the way for me and she has been on top of them all helping me get in touch with the right people and getting answers in a timely manner. She's also a huge reason my practice has built so quickly - she actively works the phones to recruit patients to the office and then presents a happy, smiling face at the desk that welcomes families and makes them feel at home. Aside from business, I also genuinely really like her personally. She's a great mom to her own "big kids" and is always offering me encouragement through the rough times with my monsters. In short, she's pretty great. And really, making this fabulous lady a few cupcakes doesn't even begin to thank her for all she does. But I hope it's a start.

So without further ado, I present a cupcake many Pinterest articles came together to create...I call them Dunkin' Donut Iced Coffee Cupcakes.

My inspiration was my friend's daily morning brew from DD. I blended elements from a few different recipes and modeled the final "look" after two or three different images I came across when searching for "coffee cupcakes" on Pinterest. I assure you, they really are as good as they look.

If you want to try making your own, I got the cake recipe from here. I followed it exactly as written using her modifications in red. The frosting was my own recipe that you will find below. The "sprinkles" are actually just a dusting of organic raw sugar from Trader Joe's. I tried to mimic the DD look by using pink cupcake wrappers and garnishing with actual straws from the restaurant.

Milk and Coffee Buttercream Frosting
2 1/2 sticks of butter, at room temperature
3 cups of confectioner's sugar
1 tsp vanilla extract
1 tbsp whole milk
1 tbsp hot water + 2 tsp instant espresso (dissolve coffee in water)
  1. Beat butter on medium speed in the bowl of a stand mixer until very soft and "white" in appearance.
  2. Add 2 cups (240g)* confectioner's sugar, vanilla extract, and milk to the mixer and beat for at least two minutes until smooth and thick.
  3. Remove 1 1/2 cups frosting from the mixing bowl and set aside.
  4. Add 1 cup (120g) confectioner's sugar and the espresso/water mixture to the mixer bowl and beat for at least 2 minutes.
  5. Decorate cupcakes by piping large circle of coffee buttercream first, then smaller circle of "milk" buttercream. Sprinkle with sugar and top with straw (if desired).
*I use a small food scale to measure the sugar and get more precision in my recipes.

Thursday, January 9, 2014

Baked Pumpkin Cranberry Oatmeal To Go

I spent a large portion of last year really focusing in on nutrition and trying to figure out the best things for my family to be eating. I lost a lot of weight in the first half of the year and was feeling pretty good about all of the fresh, local foods we were eating. Then, we got an offer on our house and my whole world turned upside down.

We only had a month to get our entire house packed and to find a place to live. I was also planning bear's first birthday party which is always extremely time consuming for me. In addition, we were going to Disney World and had to pack and plan for that. Somehow we made it through, but then we came home and we were living in a tiny apartment. We had to make all the arrangements and preparations for Christmas in our limited space. Finally we made our second move into my parent's house between Christmas and the New Year.

After the house sold all of the stress and craziness was just too much. I wanted to stick with everything I had been working towards, but was just so overwhelmed. I started hitting up drive-thrus again, we ordered takeout multiple times per week, and I was constantly making unhealthy food choices for myself at work. And (not surprising) I started to feel horrible. Mentally, I was disappointed in myself. Physically, my body was feeling uncomfortable - stomachaches, acid reflux, gastritis (probably an ulcer too), skin breakouts, and a generalized feeling of heaviness. 

Now that we are moved and settled (for at least the next 5 months anyway) I'm really motivated to get back on the wagon. I've rejoined Weight Watchers. I'm making a plan to get back to the gym at least three days per week. I'm feeling really optimistic and excited to go forward. 

All that said, It's very easy for me to let my mommy obligations get in the way of a healthier, happier lifestyle for myself. I know I need to have a plan or I won't succeed. The first part of this plan for me is not having to think about breakfast. Each week I am going to make something over the weekend that has me set for success each morning. Something easy that doesn't require any fussing over. Which brings me to my first recipe share of the New Year...


Baked Pumpkin Cranberry Oatmeal To Go
Based on the recipe for baked oatmeal found here

Yields: 12 muffins at 4 points plus each

2 eggs
1/4 cup pure maple syrup
1 tsp baking soda
1 tsp vanilla extract
1/4 cup melted butter
1 apple, grated
1 1/4 cup 1% milk

3 cups rolled oats
1 tsp cinnamon
1 cup fresh cranberries
1/2 cup canned pumpkin puree
  1. Preheat oven to 375 and grease muffin tin with non-stick spray.
  2. Mix first 7 ingredients together with a mixer.
  3. Add last four ingredients and mix by hand until well blended. The mixture will be very loose and wet still. Allow to rest in the mixing bowl for at least 30 minutes.
  4. Divide evenly between muffin wells and bake for 25-30 minutes until set.
  5. Can eat hot or freeze* for later use. Store at room temperature for 3 days, in the fridge for 7 days, or in the freezer for one month.
They are delicious at room temp, but I prefer to re-warm them in the oven at 350 for five minutes when I have time.
*If frozen, reheat by setting oven to 350, wrapping muffin in foil and baking for 5 minutes. Turn off oven and leave muffin in for 10 minutes longer.

Monday, September 2, 2013

Brown Butter and Sea Salt Chocolate Chip Cookies filled with Nutella

Brown butter is, in a single word, amazing. It's my new obsession. I am in love with everything from the mild, nutty scent that wafts from the saucepan as it cooks to the rich, almost caramel flavor it lends to a cookie baked with it. I am featuring the recipe for nutella stuffed cookies in this post, but these chocolate chip oatmeal cookies with brown butter that I made for dessert last week got rave reviews as well.

If you've never had a cookie made with brown butter you can't possibly understand what you are missing. Please, do yourself a favor and make a batch (or two) of these cookies...


I'm not going to over-complicate this post and distract you from the task at hand (baking these cookies ASAP). Go visit Ambitious Kitchen for the full recipe and a great photo pictorial on how to add the nutella.

Disclaimer: My cookies spread a lot more than her's did. I definitely did the full two hours (a little longer) chill time in the fridge and even froze the stuffed dough disks for an extra 10 minutes after the first batch spread and it didn't make a difference. They might have spread because I used white whole wheat flour (I no longer purchase refined white flour) or replaced the white sugar with raw turbinado sugar. Honestly, this whole discussion can be ignored because it did not matter one teeny, tiny bit that they spread. They still were so delicious I wish I was eating one right now...but I can't...because my husband ate the last three hours ago...

Saturday, June 15, 2013

Cake Pop Secrets

Before I share these tips, I need to put it out there that I recognize the possible hypocrisy of this post. I've been focusing a lot on real food and cake pops are definitely not real food. Nearly everything I've read about real food acknowledges that sometimes we are going to have foods that are more industrial and less than perfect. With a kid in the house and my own love of baking and decorating, I am willing to admit that cake pops are going to happen. Not as often as I would have in the past, but every now and then I'm willing to let a pop slide by.

After lamenting the loss of many a cake pop in the past, I have finally devised an (almost) fool proof method for excellent cake pops. Here are my tips...

  1. Plan ahead! Ideally cake pop making should be spread over 2-3 days. First, the cake should be baked and cooled. Next, the frosting/ganache can be made and combined with the cake crumbs to create the cake balls. Lastly, the dipping and decorating can be done.
  2. If using boxed cake mix, replace most of the oil with water to make the cake firmer.
  3. Make ganache instead of frosting - the ganache works better as a glue to hold the pops together and majorly elevates the flavor of the pop.
  4. After you make them, the cake balls should be refrigerated until firm - at least 4 hours, best if left overnight.
  5. Take out your whole container of balls and dip the sticks in chocolate before inserting them into the pops. Once all sticks are inserted, place all the pops back in the fridge until you are ready to start dipping.
  6. Keep the chocolate you are dipping in thin by adding a few drops at a time of canola oil.
  7. Dip in small batches. Only take 1-2 pops out of the fridge at a time. This will keep the cake ball cold so that the chocolate hardens quickly and smoothly. 
  8. If you are drawing anything on (see the lacing on the baseballs) or attaching decorations do it as soon as the outer coat of chocolate is hardened and before the pop "warms up" too much. 
  9. After dipping, keep the pops at room temperature out of the fridge. Putting them back in and out creates condensation and stickiness of the pop which makes them hard to wrap up and less appetizing overall.
  10. Once wrapped try to keep in a cool, dry, dark place to prevent melting!

Monday, June 3, 2013

Homemade Pitas

When I started to focus more on simple, whole foods I began looking for recipes to replace some of the store-brought staples in our house that are laced with chemicals, preservatives, and sugar. Although it takes some extra time and preparation, the end result is SO worth it.

My husband and I really enjoy eating hummus as a snack, but I've been really disappointed by the taste (or lack thereof) of wheat pita bread options at the store. It's even more disappointing when you read the labels and see how many additives there are. So, my search for a better option began. I made a few batches of pita bread from this recipe. Although the bread tasted good it didn't "puff" and form a pocket like you'd expect from a pita (it was more of a flat bread). Today I decided to give a new recipe a try and I am so glad I did. These pitas puffed just right and taste great. You will never accept the store brought variety again after trying these...


Adapted from this recipe over at Mama's Gotta Bake
Ingredients
1/4 cup warm water
Pinch of sugar
Packet of active, dry yeast

3+ cups of whole wheat white flour
1 tsp sea salt
1 1/4 cups warm water
2 tablespoons olive oil
2 tsp honey
Coconut oil spray (or oil)
Directions
  1. Dissolve sugar and yeast in warm water and let stand for 10 minutes until bubbly.
  2. Pour yeast mixture into bowl of stand mixer and add 3 cups of flour, salt, oil, honey, and water.
  3. Stir mixture with wooden spoon until moistened.
  4. Attach dough hook and mix on low for 10 minutes (you could knead by hand, but I'm too lazy for that). 
  5. If the dough isn't coming together after the mixer has been on for 5 minutes, add more flour a TBSP at a time. You want the dough to be cohesive enough that it kind of rolls into a ball around the dough hook.
  6. Take the dough out of the mixer and knead it a few times by hand before forming it into a ball. (I sprayed my hands with the coconut oil to prevent the dough from sticking to me for this step).
  7. Spray a bowl with coconut oil (or grease with olive oil) and put the dough ball into the bowl. 
  8. Place dough into a pre-warmed oven (set to 120 degrees, opened to let the big rush of heat out, and then turned off) or just cover it with a towel and place in a warm place to rise.
  9. When the dough has doubled in size (approximately 1 hour), punch it down and divide into 10-12 pieces (depending on the size of the pitas you want). I did this by shaping the dough into a rough log shape, cutting in half, cutting in half again, and then dividing each quarter into three equal-ish pieces. Roll each piece into a ball shape and set aside to rest on a lightly greased cookie sheet. Cover the balls with a piece of plastic wrap that has also been spritzed with oil and set aside for 20-30 minutes.
  10. While the dough is resting, place a baking stone (or non-stick cookie sheet) into the oven and preheat to 400 degrees.
  11. When the oven is heated and your dough is done resting, prepare a lightly floured surface to roll out the pitas. I sprinkled a little bit of extra flour on each side of the dough, flattened it with my palm, and then rolled it to a rough circle/oval shape approximately 1/8-1/4 of an inch thick.
  12. Working in batches of 2-3 (depending on how big your pitas are), place the rolled out pitas onto the baking stone/cookie sheet and bake for about 5 minutes. I really recommend setting a timer for 4 minutes and checking them at that point. At five minutes my pitas were just barely browned, but the puffed tops were firm to the touch. Cook less for softer pitas, longer for crisper pitas.
  13. Remove pitas from oven with a spatula or tongs and place to cool on a baking raking.
  14. Fill with the stuffing of your choice, cut into wedges to use with dip, or be inpatient and eat one still warm from the oven like this girl right here did! 

Thursday, March 21, 2013

Banana Cupcakes with Nutella Frosting

After reading one of my healthy weight watchers recipes and then checking my facebook and seeing a photo of the extremely unhealthy cupcakes I made for my husband's birthday, my cousin challenged me to create a delicious cupcake that was low in points. I was going to wait until the weekend so that I had more time to play around with ingredients, but I was eager to get started and came up with this recipe this morning. It's obviously not the Coffee Heath Crunch Cupcake (recipe coming soon!) seen below, but I take it as a big compliment that my picky three year old who usually licks the frosting off cupcakes and throws the rest away ate the whole thing!


Banana Cupcakes with Nutella Frosting (3 points plus)
Recipe makes 24 cupcakes

Banana Cupcakes (serving size one cupcake, 2 points plus)
2 cups all-purpose unbleached white flour
1 1/2 tsp baking powder
1/2 tsp baking soda
1 tsp ground cinnamon
2 tbsp butter, softened
1/3 cup plain, nonfat Greek yogurt
3/4 cup sugar
3/4 cup fat free egg substitute (equivalent of 3 eggs)
2 tbsp fat free milk
1 tsp vanilla extract
3 ripe bananas, mashed

  1. Whisk together flour, baking powder, baking soda, and cinnamon.
  2. Blend butter and yogurt in the bowl of a stand mixer with paddle attachment for 2 minutes.
  3. Add sugar to the bowl and beat until well blended.
  4. Beat in eggs 1/4 cup at a time, mixing until incorporated. 
  5. Add in milk and vanilla.
  6. Stir in half of the flour mixture, then the bananas.
  7. Finally, add the last of the flour mixture and stir until just incorporated.
  8. Divide evenly into 24 cupcakes liners, fill each approximately 2/3.
  9. Bake for 18-22 minutes until toothpick inserted in the center comes out clean.
Nutella Frosting (serving size ~1 tbsp, 1 point plus)
4 tbsp butter, softened
2 tbsp nutella
3/4 cup confectioner's sugar
1-2 tsp fat free milk
  1. Using hand mixer, beat butter and nutella together until smooth.
  2. Add confectioner's sugar 1/4 cup at a time beating until fully incorporated after each addition.
  3. Finally, add milk by 1/2tsp until desired consistency is reached (I used the full 2 tsp).
*After I took my photos I saw one of the heath cupcakes I made for my husband and quickly calculated the points and realized you can top each cupcake with 1 tsp crushed heath without increasing the points value!*


The cupcake that started it all...

Sunday, March 17, 2013

Happy St. Patrick's Day!


We've been getting in the green spirit for a few weeks around here and we topped off the morning with an entirely green breakfast! Daddy made some disturbingly green eggs and ham for the bug for breakfast while I whipped up a batch of these semi-healthy donuts. The original recipe can be found here. I modified only by replacing 1 cup of regular white flour with whole wheat flour.

I wouldn't call these donuts fabulous, but they had a great texture/crumb and were tastier dipped in my cup of coffee. Also, the glaze looked pretty, but didn't have much flavor. Next time, I would add a tablespoon of melted butter to make it richer.

Sunday, March 3, 2013

Snicker-DO-dlles


Prior to a few months ago I had never made snickerdoodles. Whenever I was looking for a new recipe they never seemed "exciting" enough, so I would pass them over. Back in the fall I had pinned a recipe for pumpkin snickerdoodles and the pumpkin addict in me couldn't help making them. They were quite delicious and my bug really enjoyed them because the process of rolling the dough into balls, dipping in cinnamon sugar, and squashing them with a cup was fun for her.

The bug has a ridiculously detailed memory for a 3/4 year old and started asking me again this past week if we could make snickerdoodles. As we were getting together with some family this weekend, I told her we could make them on Saturday. I did a quick check of the pantry to make sure I didn't need anything at the store and saw what I thought was a can of pumpkin.

Fast forward to yesterday when we were literally 3/4 of the way through the recipe - the wet ingredients were mixing in our Kitchen aid while my bug was whisking together the dry ingredients - when I went to grab the can of pumpkin and discovered it was actually a can of evaporated milk with a picture of pumpkin pie on the front! Oops! As I was frantically looking around the kitchen trying to determine what I could use in place of the pumpkin (applesauce?? all out! bananas?? not ripe enough! ahhhh!), my bug was becoming more and more frustrated with the delay. Finally, she gave me a withering dirty look and said, "Mommy, just DO IT!"

So I did. I skipped adding the pumpkin and just added the flour mixture to the wet ingredients. The dough was WAY too thick, so I grabbed the fat free half and half from the fridge and added about 1/4 cup. The dough was still firmer than when we made the pumpkin version, but it was actually easier to roll.

I crossed my fingers and popped them in the oven. Wouldn't you know, they came out delicious! They were lightly spiced, sweet, and with a dense crumb that made them crisp to bite, but melt in your mouth buttery. Mmm, I think I'm going to go get one to dunk in my coffee right now!

Snicker-DO-oodles
For cookies:
1 cup butter at room temperature
1 cup sugar
1/2 cup lightly packed brown sugar
1/4 cup milk or half and half
1 egg
2 teaspoons vanilla extract
3 3/4 cup unbleached white flour
1 1/2 tsp baking powder
1/2 tsp salt
1 tsp ground cinnamon
1/2 tsp ground nutmeg
1/4 tsp ground ginger

For cinnamon sugar coating:
1/2 cup sugar
1 tsp ground cinnamon
sprinkle of ginger, nutmeg, and allspice

Flattened cookies on their way into the oven
Just baked on the cooling rack

  1. Preheat oven to 350 degrees.
  2. Beat butter and both sugars on medium speed for 2-3 minutes.
  3. Add egg and vanilla.
  4. In a separate bowl, whisk together all dry ingredients (flour, baking powder, salt, and spices).
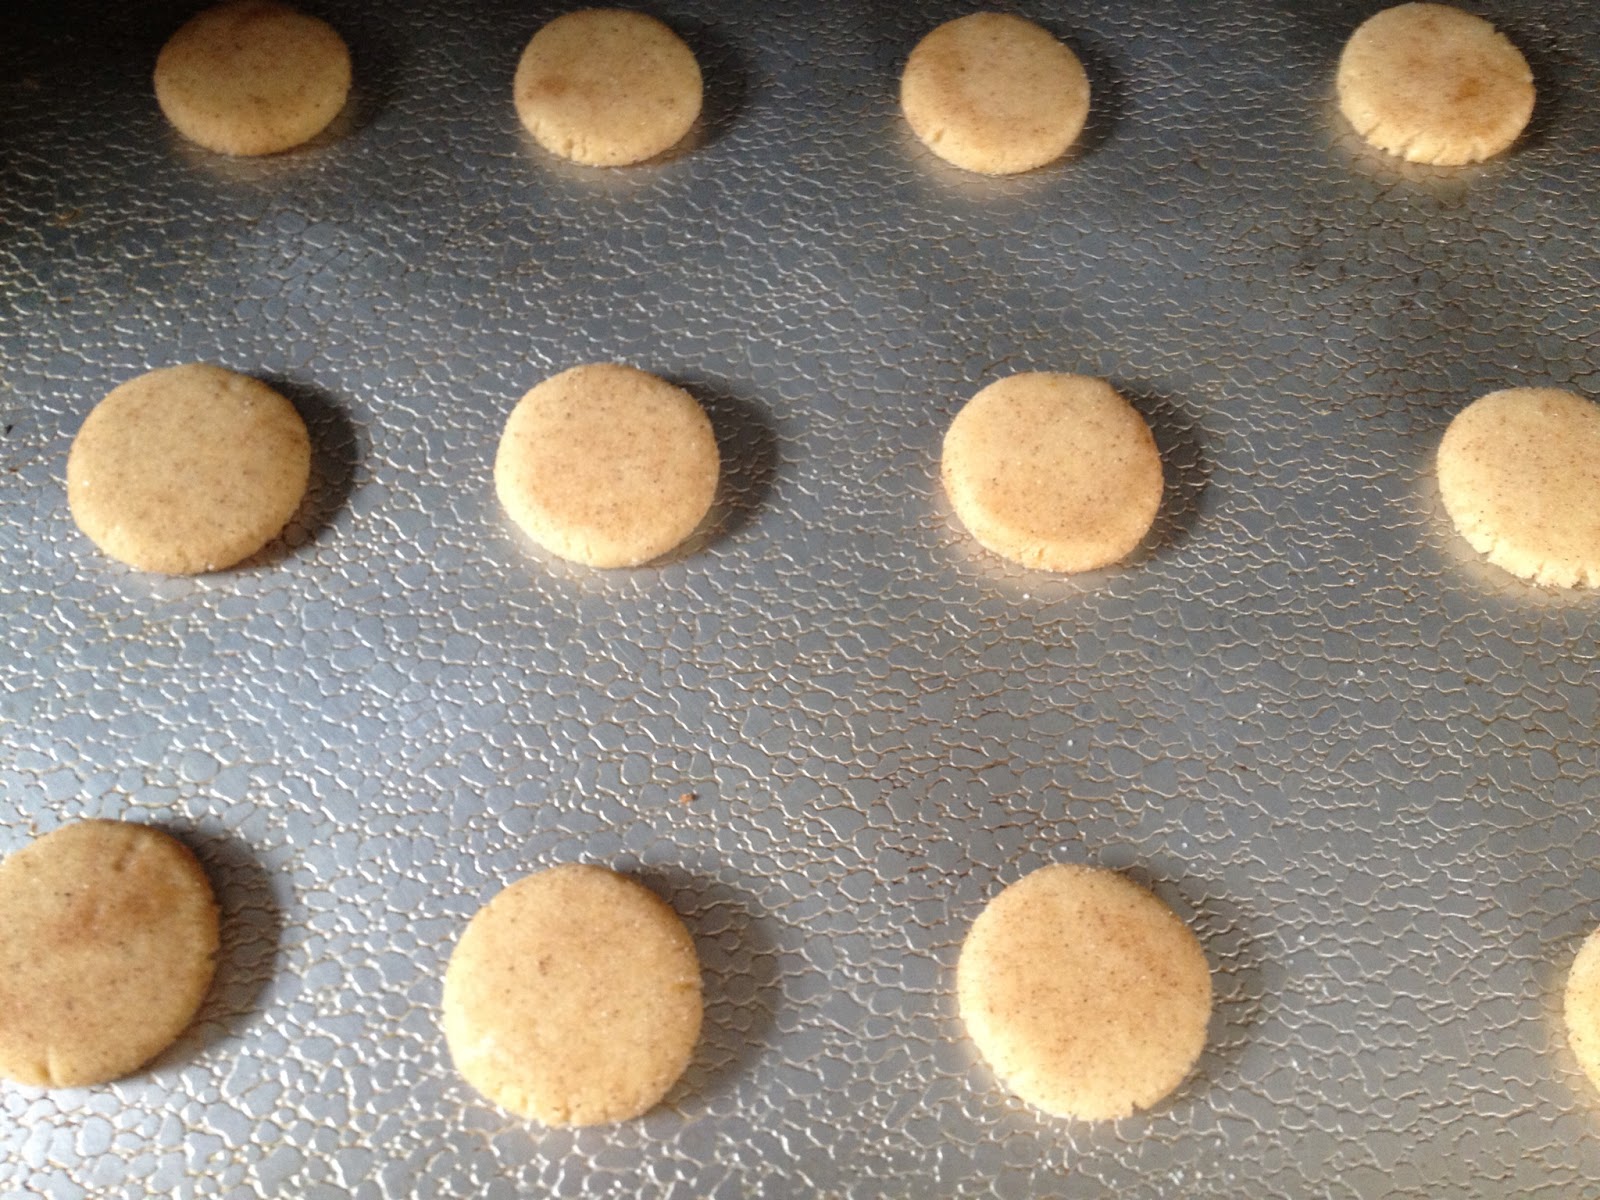
  5. In small increments, add dry ingredients to the wet ingredients in the mixing bowl (warning: it will be very thick!)
  6. Add the milk to soften the dough up.
  7. Roll dough into balls (the size is up to you!).
  8. Coat balls in the cinnamon sugar mixture and place on a baking sheet.
  9. Use the bottom of a glass to flatten the cookies.
  10. Bake for 8 minutes if small cookies (bug made bite sized ones), 10-12 minutes if larger cookies.

Tuesday, February 19, 2013

One Recipe Two Ways

Last week I was churning out sweets and treats like you wouldn't believe. Overall, I was very happy with how things came out, but have been obsessing over the process I went through with my cake pops. I've done them before and although they always take forever, I've never been quite as ready to pull my hair out as I was with those Hello Kitty pops. The craziest part is that the decorating wasn't the hard part, it was getting the cake to stay on the stick! In line with my OCD personality, I've been obsessing about having a redo to prove to myself that it was the stupid box mix that created the issues and not my lack of skills.

As I had also promised my co-worker I would make another batch of red velvet cupcakes for her family, I came up with the following plan: double the batch of red velvet cupcake batter, use half for her cupcakes and half for a 9 x 13 sheet cake, make a single batch of marshmallow fluff frosting, and use the sheet cake to make cake pops. I did make one of the cake balls into a pop (and it worked perfectly!), but just made the rest into truffles. Have I mentioned that I hate how calling them "cake balls" sounds? I glam it up by calling them truffles. I present to you...

Red Velvet Cupcakes and Red Velvet Cake Truffles


All you have to do to make the truffles is:
  1. Crush the sheet cake by hand. 
  2. Set aside about a cup of crumbs. 
  3. Mash in all the remaining frosting left after you frost the 12 cupcakes. If the mashed up dough seems too wet, add more of the crumbs that you reserved. If not, chuck them in the garbage bin, use them as garnish, or eat them right then and there with your fingers. 
  4. Roll the dough into small 1-1/2 inch balls and freeze for 1 hour. 
  5. Melt 1/2 bag of dark chocolate morsels in a double boiler.
  6. Dip the balls and put on a baking sheet lined with wax paper.
  7. Refrigerate (or just set aside) until chocolate is set.
  8. Try not to eat them all in one setting...

Tuesday, February 12, 2013

Brown Butter Banana Bread Cookies


I almost always have bananas in various stages of ripening on my counter because I only like to eat them once they are yellow and just starting to turn a few brown spots - but if they get too many spots the deal is off and the idea of eating one literally makes me gag. Once they reach the perfect ripeness, I need to eat them within 48 hours or they become baking material. This insanity is why I am always on the lookout for good recipes to use up bananas. I pinned this recipe from Tracey's Culinary Adventures and tried it out as soon as I had a few overripe bananas.

The cookies themselves are completely yummy and stand alone nicely without the frosting...BUT, I couldn't help trying it out. Although I followed Tracey's cookie recipe quite closely, I changed the frosting significantly to cut down the WW points (with frosting 4 points plus, without frosting 3 points plus).

For the cookie recipe, see Tracey's site. I only altered the spices - 1 full tsp cinnamon, 1/2 tsp nutmeg, 1/4 tsp allspice, and 1/4 tsp ginger to make them stronger. I made 36 cookies by measuring level tablespoons.

For the frosting:
2 cups confectioner's sugar
1/4 cup butter
2-4 tbsp fat free half and half
1 tsp vanilla extract

Melt the butter in a small pan over medium heat. Swirl the pan frequently allowing the butter to cook until you start to see small brown flecks in it - be careful not to let the butter burn! Add the melted butter (make sure to scrape the yummy browned bits out too!) to a heat-proof bowl with you confectioner's sugar. Add vanilla and 2 tbsp of the half and half. Beat until well blended. If the frosting is too thick, add more half and half by the tsp until it is the consistency you want.


Wednesday, January 30, 2013

Oreo Cupcakes


I fear my blog is very bipolar these days. I'm flipping between healthy Weight Watchers recipes and super decadent desserts faster than yours truly a kid can devour a chocolate bar. It just so happens that January is a birthday heavy month for my family and friends while I am still (mostly) sticking to my new diet. And honestly, I just LOVE to bake - birthdays or no birthdays, diet or no diet.


The recipe I am sharing today is one of those that didn't have an occasion. I stumbled across a few different recipes using Oreo cookies on one of my favorite cooking blogs (Annie's Eats) and couldn't get them out of my head until I gave it a try. I followed her recipe for the cupcakes exactly. I intended to top them with a marshmallow frosting I pinned awhile back.

Following the directions, the frosting came out beautifully - nice pillow-y, shiny peaks of lightly sweetened, fluffy goodness. Then, I had the brilliant idea to add crushed Oreos, destabilized it, and turned it into soup. The second time around I stuck with a classic buttercream and balance was restored to the universe as cake and frosting came together to create these delicious treats.


Buttercream Frosting
2 sticks of butter, at room temperature
2 1/2 cups confectioner's sugar
1 tsp vanilla extra
1 tbsp heavy cream

  1. Beat the butter in the bowl of a stand mixer for a full five minutes on medium speed until it is whipped
  2. With mixer on low, add the confectioner's sugar gradually until all is incorporated
  3. Scrape down the sides of the mixer with a rubber spatula
  4. Add the vanilla and heavy cream
  5. Beat for 2 minutes on medium/high speed
  6. Use pastry bag to pipe frosting
  7. Sprinkle with crushed Oreos (if desired)

The secret surprise in these cupcakes: half an Oreo in the bottom of the cupcake liner!
My little taste tester - note: she only eats her cupcakes with LOTS of added sprinkles

Sunday, January 20, 2013

Hazelnut Mocha Cupcakes with Espresso Buttercream

This past week the office manager for my practice celebrated her birthday. Since I began working with her last year she has been a HUGE help for me. She has been an advocate for getting me integrated into the practice and has talked me up to recruit new patients - in summary, I love her! I wanted to make her a special treat for her birthday so I took something I love doing (baking cupcakes) and combined it with something I know she loves (coffee) and something everyone loves (nutella!) and created these...


Hazelnut Mocha Cupcakes with Espresso Buttercream
I searched through lots of recipes and combined a few different ideas I saw along the way. The cupcake and frosting recipe can be found here. I upped the yum factor by adding nutella.
  1. Cook cupcakes according to directions
  2. When the cupcakes are cooled, use a melon baller to scoop out the middle
  3. Soften about 1/2 cup of nutella in the microwave on half power for 30 seconds
  4. Using a pastry bag, fill in the cupcake with about 2tsp softened nutella and replace the scooped out ball of cupcake on top (squish it down so the top is mostly level again)
  5. Follow the frosting recipe and pipe frosting on top
  6. Decorate with mini chocolate chips, chocolate shavings, chocolate sprinkles, or chocolate covered espresso beans

Tuesday, October 18, 2011

Candy Corn Cupcakes

This is going to be a very short post as I can just link to the two recipes I used:-)

Go to Scharffen Berger's site and click "Make a vanilla cupcake." Once there look for the link in the upper right that says "Get our base cupcake recipe." I followed the recipe exactly. At the end I divided the batter into two bowls and used food coloring to make half yellow and half orange. I put one spoonful of yellow into the cupcake liner followed by a spoonful of orange to mimic a candy corn. Bake as directed

I used this buttercream recipe and it might be my new favorite! I halved it to avoid too much leftover. I did add a little bit more milk than called for so it would be softer - you can play with it as you go to get the consistency you want.

Enjoy!

Friday, August 19, 2011

Cupcakery

(a dangerous trio: Raspberry White Chocolate, Margarita, and Rum Punch cupcakes)

Our family recently had the pleasure of celebrating the marriage of my husband's cousins to a very wonderful guy. As many family had traveled for the event, the bride and groom hosted a day-after-the-wedding party at their new home. I'm always looking for an excuse to bake, so I offered to bring dessert. I decided to continue the theme of celebration with some spiked cupcakes. I know cupcakes are a big "trend" in baking right now, but I love them for so many more reasons than their trendiness. Here are a few if the reasons I adore them so very, very much: easy to portion control, inherently kid-friendly, simply portable, very fun to decorate, and amendable to cute dessert displays.

Anyway, on to the cupcakes! The Margarita and Rum Punch versions are spiked, but the final recipe is alcohol free.

Margarita Cupcakes

I found the recipe for these on another food blog I like to follow called Tracey's Culinary Adventures. As I LOVE lime, I was practically drooling just thinking about this recipe. I followed her recipe exactly and they were delicious! See her website for a much prettier picture that actually does these beautiful cupcakes justice! I was just lucky my photographer remembered to snap a shot before he devoured the leftovers...

Rum Punch Cupcakes


Once again, the picture leaves something to be desired, but the flavor of these amazing coconutty, rum drenched, pineapple whipped cream topped delights does not. I found this recipe on another food blog called Annie's Eats. Once again, I followed her recipe to the letter and was very pleased with the results. The only thing I added was the cherry on top for a garnish.

Raspberry White Chocolate Cupcakes


This recipe was also borrowed from Tracey's Culinary Adventures (recipe here).These cupcakes were very pretty and dainty in appearance, but quite dense when you ate them. The white chocolate cupcake was not light and fluffy like the other cakes, but heavier like a pound cake. Not bad, just different. The issue I did have with them was that I felt the frosting was too sweet - it was the kind of sweet that makes the insides of your cheeks tingle from all the sugar! I would definitely make them again, but with about 1/2 the sugar in the frosting. Also, I did skip filling them as I was running out of time. (I made use of the extra raspberry filling as a yogurt stir-in and as a topping for baked brie, yum!)

Tuesday, January 25, 2011

Irish Carbomb Cupcakes


The recipe was shared with me by one of my co-workers from the PICU, so I can't spread it around. BUT, if you are very nice to me, I might just make them for you someday...

1. Guinness chocolate cupcake
2. Fill generously with Jameson dark chocolate ganache
3. Top with Bailey's buttercream frosting
4. Enjoy!