Follow Me on Pinterest

Friday, June 21, 2013

Strawberries for every meal

Although I did visit the Farmer's Market and stocked up on basic supplies (milk, eggs, and salad greens) last weekend, this week has been a disaster for meal planning. Between travel, meetings, and family celebrations I didn't get to make many real dinners this week. As I don't have too many meals to share, I decided to focus on one ingredient we used a lot this week instead...

...Strawberries!!

I fondly remember picking strawberries with my mom and sister every summer. Unfortunately, I feel as if the berries weren't treated properly. We would pick a whole bunch of them (because it was fun!), have strawberry shortcake that night, eat a few over the next few days, freeze some, and everything else ended up rotting because we get bored of them.

I was dedicated to not letting that happen this time! We took the kids on Father's Day morning to a small, very reasonably priced local farm and picked 4 pounds of berries. By Wednesday morning every last berry had been eaten and I took the girls back to pick more! Here are some of the delicious ways we enjoyed our fresh berries...

Breakfast - Delicious whole wheat based banana bread incorporating fresh whole berries
Adapted heavily from this recipe
Ingredients
3 very ripe bananas
10 small strawberries
2 eggs
2 1/2 cups white whole wheat flour
1/2 cup natural sugar
1/3 cup unsalted butter
1/4 cup coconut oil
1/2 cup milk
1 tsp baking soda
1 tsp salt
1/4 cup brown sugar

  1. Preheat oven to 350. Grease or spray a loaf pan with butter/oil. Mash bananas in a bowl and set aside.
  2. In bowl of stand mixer, cream together butter, coconut oil, and natural sugar. Add milk, eggs, and bananas and mix until well blended.
  3. Mix together dry (flour, baking soda, salt, brown sugar) ingredients in a separate bowl with a whisk. Add dry ingredients to the wet ingredients and mix just until incorporated.
  4. Pour batter into prepared loaf pan. Insert the whole strawberries into the batter - push them in just until they disappear, but not far enough that they are touching the bottom of the pan.
  5. Bake for 60-70 minutes.

Lunch - Refreshing yogurt and granola parfaits perfect for lunch on a warm summer day
Homemade whole milk yogurt and homemade granola make this a great "real food" for breakfast, lunch, or snacking!

Dinner - Fresh crisp lettuces, sweet berries, creamy feta, and crunchy homemade croutons topped with tangy honey mustard vinaigrette make this a great pairing with the grilled protein of your choice
Strawberries pair beautifully with the feta and honey mustard dressing in this flavorful side
Honey Mustard Vinaigrette (from Real Food Has Curves)

Mix together all ingredients in a small bowl with a whisk until well blended:
  • 6 TBSP olive oil
  • 1/4 cup white wine vinegar
  • 1 tablespoon Dijon mustard
  • 2 teaspoons honey
  • 1 mashed clove of garlic
  • 1/2 tsp ground black pepper
  • 1/4 tsp salt


Dessert - Rich, creamy strawberry ice cream churned at home with nothing artificial added!
Scaled down and modified based on what I had in my fridge from this recipe
Ingredients
1 cup reduced fat or whole milk
1/2 cup whipping cream
1/2 cup half & half
1/2 cup natural sugar
8oz pureed fresh strawberries
Splash of lemon extract
Dash of sea salt

  1. Mix all ingredients in a bowl with a whisk
  2. Freeze according to ice cream maker directions
  3. Remove to a freezer safe container and continue freezing

Saturday, June 15, 2013

Cake Pop Secrets

Before I share these tips, I need to put it out there that I recognize the possible hypocrisy of this post. I've been focusing a lot on real food and cake pops are definitely not real food. Nearly everything I've read about real food acknowledges that sometimes we are going to have foods that are more industrial and less than perfect. With a kid in the house and my own love of baking and decorating, I am willing to admit that cake pops are going to happen. Not as often as I would have in the past, but every now and then I'm willing to let a pop slide by.

After lamenting the loss of many a cake pop in the past, I have finally devised an (almost) fool proof method for excellent cake pops. Here are my tips...

  1. Plan ahead! Ideally cake pop making should be spread over 2-3 days. First, the cake should be baked and cooled. Next, the frosting/ganache can be made and combined with the cake crumbs to create the cake balls. Lastly, the dipping and decorating can be done.
  2. If using boxed cake mix, replace most of the oil with water to make the cake firmer.
  3. Make ganache instead of frosting - the ganache works better as a glue to hold the pops together and majorly elevates the flavor of the pop.
  4. After you make them, the cake balls should be refrigerated until firm - at least 4 hours, best if left overnight.
  5. Take out your whole container of balls and dip the sticks in chocolate before inserting them into the pops. Once all sticks are inserted, place all the pops back in the fridge until you are ready to start dipping.
  6. Keep the chocolate you are dipping in thin by adding a few drops at a time of canola oil.
  7. Dip in small batches. Only take 1-2 pops out of the fridge at a time. This will keep the cake ball cold so that the chocolate hardens quickly and smoothly. 
  8. If you are drawing anything on (see the lacing on the baseballs) or attaching decorations do it as soon as the outer coat of chocolate is hardened and before the pop "warms up" too much. 
  9. After dipping, keep the pops at room temperature out of the fridge. Putting them back in and out creates condensation and stickiness of the pop which makes them hard to wrap up and less appetizing overall.
  10. Once wrapped try to keep in a cool, dry, dark place to prevent melting!

Friday, June 14, 2013

Farmer's Market Menu 6/10

I'm going to try and make this a regular feature to help inspire others to really get into shopping/cooking local. To allow myself the time to actually do this, I'm going to keep the commentary to a minimum. Basically, I'll share what I bought and how I used it with photos and links to recipes with modifications.

Pint of Battenkill Creamery half and half
Pint of Battenkill Creamery chocolate milk
Dozen Cornell Farms eggs
Head of Chinese cabbage
Large bunch of cilantro
2 quarts of white mushrooms
1 pound of cube steak
3/4 pound of lamb steak
1.5 pounds hot sausage
Garlic scapes
Bag of spinach
Sunday - Slow Cooker Lamb Curry. I modified by swapping a can of organic garbanzo beans for the potatoes. Next time, I would add more spices to punch it up a bit and decrease the amount of broth to make the sauce thicker. Overall, a tasty recipe.

Monday - Stir-fried Cabbage, Mushrooms, and Broccoli in Garlic Sauce with Brown Basmati Fried Rice. I cooked the fried rice in the pan first, removed it to a covered dish, and then made the stir-fry in the same pot to save dishes. I made the garlic sauce ahead of time and added it to the pan after cooking the vegetables. I just cooked it long enough to thicken the sauce. 


For dessert, bug and I attempted to make some ice cream. This turned into somewhat of a disaster because my ice cream canister wasn't frozen enough and the mixture didn't churn properly. As I had already invested so much time and valuable raw ingredients (milk, natural sugar, half and half, vanilla beans, and eggs) into the project, I froze it anyway. The consistency was off, but the flavor was there. It was essentially a rich, creamy frozen vanilla custard. I served it drizzled with clover honey and toasted almonds.


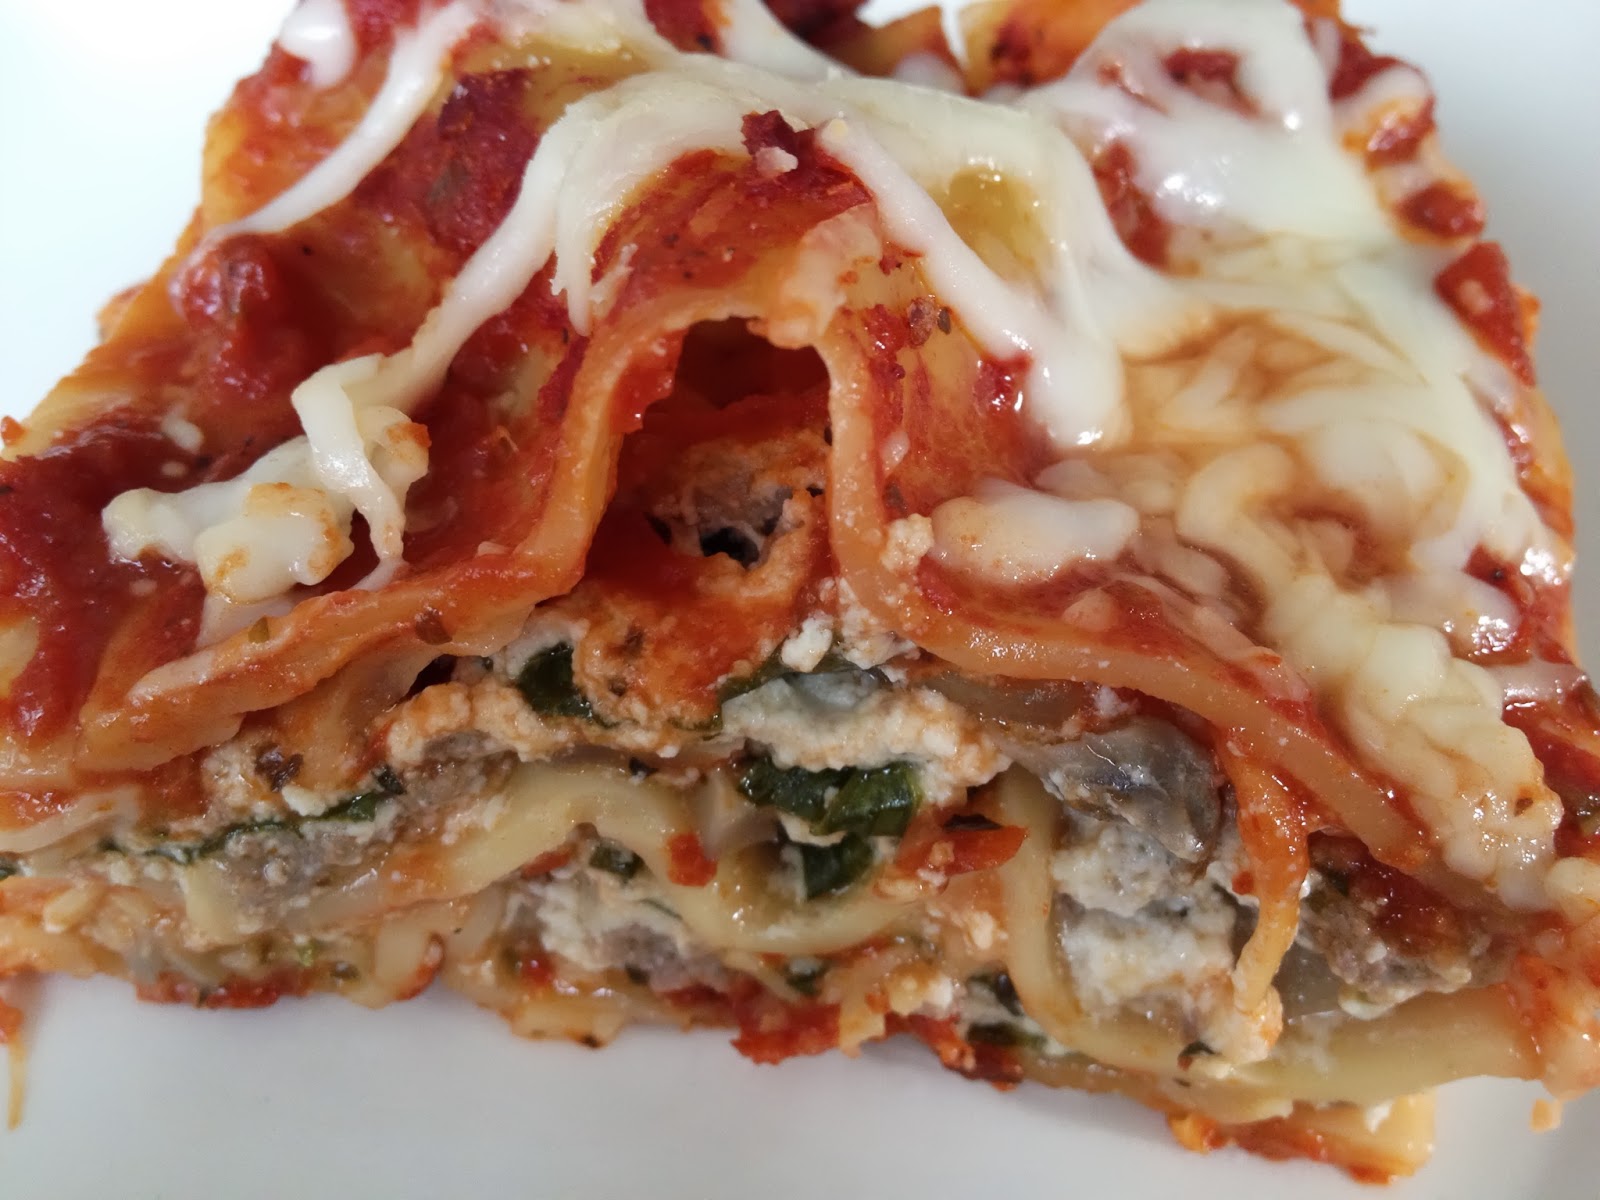
Tuesday - Spinach and Mushroom Lasagna. I ran into a sale on all natural/grass fed ground beef, so I decided to make this a meat lasagna for my husband. I used Trader Joe's no boil lasagna noodles. I cooked the beef first and added the onions/mushrooms to it. I didn't bother to cook the spinach, I just chopped it and mixed it into the ricotta. I didn't use Romano cheese, I had Parmesan so that's what I used. I didn't add egg to the ricotta mixture. I decreased the total amount of mozzarella to 2 cups. Everyone, including the bug and baby bear, loved this dinner.


Wednesday - I am home with the girls on Wednesday mornings, so we usually have a full cooked breakfast. This week I heated up some frozen pancakes that I originally made on Monday and made us omelettes. I used the egg whites that were leftover from the ice cream experiment mixed with fresh dill, fresh chopped spinach, ham, mushrooms, and feta for my breakfast. 


My husband liked the cube steak we made last week so much, I used the same exact recipe this week. For sides, I sauteed some leftover radishes with a bit of olive oil and then finished them with butter, white wine vinegar, salt and pepper. I also made a simple side salad of chopped organic romaine, organic grape tomatoes, and mozzarella pearls tossed with homemade Italian dressing. 


Thursday - I attended a CME (Continuing Medical Education) training session on Adolescent Reproductive Health (one of my special areas of interest at work) this evening so the family just had leftover lasagna with some simple buttered carrots and baby zucchini.

Friday - I was really burnt out by the end of the week and couldn't bear the thought of cooking another meal, so we opted for some (not so healthy) take-out.

Other special things I cooked up this week were a big batch of plain whole milk yogurt and a dozen whole wheat tortilla shells.

Sunday, June 9, 2013

Cooking the FM

It's been a week and I never checked in about what I was cooking with all the products I scooped up from the Farmer's Market last week. Where have I been? Why haven't I posted anything? Kids and exhaustion are my answers.

Life is just really crazy (I'm extrememly overdue for a "mommy" post...) and I can't seem to find the time to share on here as much as I'd like to. I know I don't really have all that many readers, but I like to think of this as my creative outlet and posting makes me happy. 

So, I am stealing 15 minutes this morning and sharing my meals from last week. Between shrieks of, "Mommy! I need - insert ridiculous demand - NOW!", cleaning/cooking non-stop, and dealing with an infant who has discovered the best way to make her needs known is through loud, disgruntled squealing I didn't remember to snap photos of everything, but I'll share the ones I did take. 

Happy reading and menu planning!

Saturday - Get together at my in-laws house and swimming for the first time this season. We ordered sandwiches, but I made the salad pictured in the upper left with organic green leaf lettuce, fresh radishes, cucumbers, shallots, homemade salt and pepper whole wheat croutons, and fresh dill dressing.

Sunday - Marinated cube steak and sauteed mushrooms/onions with organic (frozen) green beans and pasta pictured middle right. We also finished the leftover salad from the previous night.

Monday - Scrambled farm fresh eggs with dill, feta, and mushrooms on homemade pita bread (upper right) for breakfast. Dinner was fajitas made from leftover cube steak with red peppers, onions, and mushrooms, shredded cheddar, sliced avocado, and sour cream served on homemade tortilla wraps

Tuesday - For breakfast all week my kids ate whole wheat pancakes that I made over the weekend and froze. I had a conference in the evening so my husband just did take-out for himself and leftovers for the bug.

Wednesday - Before heading to work, I threw some yogurt into the oven to culture. For dinner, chicken thighs and pasta salad with the Rasta Pasta blend, pearls of fresh mozzarella, and organic grape tomatoes. Both were marinated in a homemade Italian dressing. I also threw together a quick dill cucumber salad in a red wine/mustard dressing that wasn't great. I'll tweak the recipe before I post anything about it. 

Thursday - Beet yogurt dip pictured on the middle left for lunch on leftover pitas. For dinner, mild pork sausage sandwiches with the rest of the mushrooms, red peppers, and onions on rolls from a local bakery (with regular refined flour I am sure...) and a tabbouleh like salad made with fresh herbs, quick cooking barley (I was thinking barley instead of bulgar - it turned out pretty yummy despite my mistake!), cucumbers, and feta.

Friday - Pizza was the plan! Dough and shredded mozzarella from Roma's Imports in Latham. The bug topped hers with pieces of baked ham, we made ours half and half. The first was a local red sauce topped with the leftover sausage/onions/peppers. The other half was spread with the homemade garlic scape pesto pictured on the bottom right and topped with some sundried tomatoes and cheese.


Monday, June 3, 2013

Homemade Pitas

When I started to focus more on simple, whole foods I began looking for recipes to replace some of the store-brought staples in our house that are laced with chemicals, preservatives, and sugar. Although it takes some extra time and preparation, the end result is SO worth it.

My husband and I really enjoy eating hummus as a snack, but I've been really disappointed by the taste (or lack thereof) of wheat pita bread options at the store. It's even more disappointing when you read the labels and see how many additives there are. So, my search for a better option began. I made a few batches of pita bread from this recipe. Although the bread tasted good it didn't "puff" and form a pocket like you'd expect from a pita (it was more of a flat bread). Today I decided to give a new recipe a try and I am so glad I did. These pitas puffed just right and taste great. You will never accept the store brought variety again after trying these...


Adapted from this recipe over at Mama's Gotta Bake
Ingredients
1/4 cup warm water
Pinch of sugar
Packet of active, dry yeast

3+ cups of whole wheat white flour
1 tsp sea salt
1 1/4 cups warm water
2 tablespoons olive oil
2 tsp honey
Coconut oil spray (or oil)
Directions
  1. Dissolve sugar and yeast in warm water and let stand for 10 minutes until bubbly.
  2. Pour yeast mixture into bowl of stand mixer and add 3 cups of flour, salt, oil, honey, and water.
  3. Stir mixture with wooden spoon until moistened.
  4. Attach dough hook and mix on low for 10 minutes (you could knead by hand, but I'm too lazy for that). 
  5. If the dough isn't coming together after the mixer has been on for 5 minutes, add more flour a TBSP at a time. You want the dough to be cohesive enough that it kind of rolls into a ball around the dough hook.
  6. Take the dough out of the mixer and knead it a few times by hand before forming it into a ball. (I sprayed my hands with the coconut oil to prevent the dough from sticking to me for this step).
  7. Spray a bowl with coconut oil (or grease with olive oil) and put the dough ball into the bowl. 
  8. Place dough into a pre-warmed oven (set to 120 degrees, opened to let the big rush of heat out, and then turned off) or just cover it with a towel and place in a warm place to rise.
  9. When the dough has doubled in size (approximately 1 hour), punch it down and divide into 10-12 pieces (depending on the size of the pitas you want). I did this by shaping the dough into a rough log shape, cutting in half, cutting in half again, and then dividing each quarter into three equal-ish pieces. Roll each piece into a ball shape and set aside to rest on a lightly greased cookie sheet. Cover the balls with a piece of plastic wrap that has also been spritzed with oil and set aside for 20-30 minutes.
  10. While the dough is resting, place a baking stone (or non-stick cookie sheet) into the oven and preheat to 400 degrees.
  11. When the oven is heated and your dough is done resting, prepare a lightly floured surface to roll out the pitas. I sprinkled a little bit of extra flour on each side of the dough, flattened it with my palm, and then rolled it to a rough circle/oval shape approximately 1/8-1/4 of an inch thick.
  12. Working in batches of 2-3 (depending on how big your pitas are), place the rolled out pitas onto the baking stone/cookie sheet and bake for about 5 minutes. I really recommend setting a timer for 4 minutes and checking them at that point. At five minutes my pitas were just barely browned, but the puffed tops were firm to the touch. Cook less for softer pitas, longer for crisper pitas.
  13. Remove pitas from oven with a spatula or tongs and place to cool on a baking raking.
  14. Fill with the stuffing of your choice, cut into wedges to use with dip, or be inpatient and eat one still warm from the oven like this girl right here did! 

Sunday, June 2, 2013

Farmer's Market Menu Planning

We do have a few year round farmer's markets (Troy Waterfront Market), but this is really the start of the season to start looking for fresh local products. I try to go every weekend (missed it last weekend because I was in the office) and check out what things are starting to become available. I spend the rest of the week searching out and pinning recipes so I am ready to cook with what I get the following week.This year I've been frequenting the Troy market, but might check out the Delmar one next weekend.  This was the first weekend that my goal was really to buy the majority of my groceries at the farmer's market. Pictured below is what I purchased with links to the vendors that I could remember...

1/3 pound spicy mixed lettuces
Overflowing pint of radishes
About 1 pound of red beets
Bundle of garlic scapes
Bunch of dill
Quart of white button mushrooms
Dozen local eggs
1/2 gallon whole milk
Pint of chocolate milk
1/2 pound "Rasta Pasta" blend
1/2 pound Garlic Basil fettuccine
1 lb mild Italian pork sausage
2 large chicken thighs
1.3 pounds of cube steak
I can't remember the exact prices of everything, but I went into the market with $60 and left with a pocket of change and a single dollar bill. I'm guessing I spent about $57 dollars. Not pictured, but also prominent in my menu planning is a loaf of white wheat bread from All Good Bakers that they generously gave me for free when I was in for lunch on Friday.

So far I've made:

  • a simple green salad using a handful of the radishes tossed with some store bought organic lettuce I had to use up, cucumber, and shallots and dressed with a homemade dill dressing and homemade croutons
  • thick slices of french toast (simply whisk 4 eggs, about 1/4 cup of milk, and a generous splash of vanilla then soak your bread slices before cooking in a buttered skillet/griddle - add a delicious crust to the slices by sprinkling one side with organic cane sugar as it cooks) and fried eggs
Check back later this week for more recipe/meal ideas

Sunday, May 26, 2013

Gender Reveal Party

This has been a crazy thing for me to wrap my head around, but my little sister is having a baby! A few weeks ago she and her husband went for their 20 week ultrasound and decided to find out the baby's gender. She was very excited and wanted to have some type of fun way to tell us if the baby was a boy or girl. She came up with the idea of making cupcakes with either pink or blue frosting as her "big reveal", but ended up having to work longer hours (and wasn't feeling well) the day before the ultrasound.

I love to plan a party, even a small one, so I volunteered to make the cupcakes for her. I thought it would build more suspense if the cupcakes were colored and we actually had to unwrap/bite into them to see the color, so that's what I did!

I don't know how I managed to take every single photo at an awkward angle, but I did...

Vanilla cupcakes from this incredibly simple, but delicious recipe that  you mix  in the food processor
Pink and Blue!
Ready to bake...
Topped with a simple chocolate ganache to completely cover the cake and conceal the color!

My girls happened to be extra cooperative that day, so I had some fun setting up a little tablescape for her as well. This was a very small scale event (she was just "revealing" to myself, my husband, my daughter, and her step-kids), but could easily be adapted for a full family event!

Pink tablecloth, blue fabric "runner" from my fabric scrap bin, cupcakes on display, and pink/blue gift bags  with a small gender specific gift (baby hats!)


Friday, May 24, 2013

Friday Five: Reasons Pets are AWESOME

I had a different Friday Five planned, but I've got other things on my mind today. My parents have become "snowbirds" and spend their winters in Florida. This year they were gone from mid January through last weekend. While they were gone, my mom mentioned that my childhood cat was "getting skinny" and "refusing her favorite foods" a few times, but I didn't realize the severity of the issue until they got home last Sunday.

Our poor kitty was down to about 5 pounds and on my extremely non-veterinary trained exam seemed to have some tenderness and fullness in her belly. The next day trip to the vet confirmed my suspicions; intertwined GI tumors with no potential treatment. The vet advised my parents to keep her comfortable at home as long as possible, and call if things got worse.

In what I would describe as the best possible outcome she passed sometime early this morning in the home she loved, with my parents (who adore her) and her grown-up kitten (she was pregnant when we rescued her) nearby. Rest in peace Mousey, you will be missed.

In her honor I am sharing five reasons that life is so much better with a pet...

  1. They comfort you when you are sad. Sometimes their big expressive eyes say more to soothe you than any words any person could come up with.
  2. They wait for you to come home and act SO excited to see you every single day - which totally makes you feel like a rock star.
  3. Their warm little bodies next to you can calm you after even the worst day.
  4. They LOVE you in exchange for the simple act of meeting their basic needs.
  5. They love you SO much, they love (tolerate?) your kids.

Friday, May 17, 2013

Friday Five: Real Food Recipes

For some time now I've been looking harder at the foods I feed to my family. Many times my best intentions have been crushed by the time consuming nature and financial burden of providing real food three meals a day for three (now four!) people. I've also been so lost weeding through all the different claims regarding which foods are REALLY the best that I can't shop without spending hours reading labels and find myself staying awake at night worrying about what I am going to cook the next day.

Finally, I've found a way to simplify matters:
  • I buy the highest quality meats, dairy, and produce I can by mini-shopping multiple times per week.
  • I'm only buying local dairy from Meadowbrook Farms or Battenkill Creamery and looking for a more local source for eggs.
  • I am anxiously awaiting fresh local produce, but I am also accepting the rule that conventional produce is better than no produce.
  • I've stopped cooking things like potatoes, rice, or pasta just because I think there needs to be a "starch" on the table.
  • Anything I can make, I am trying to make myself including sandwich bread, rolls, pita bread, granola, yogurt, ricotta, etc. I've also started juicing (more on that later...).

I'm premiering my new focus on nutrition with a Friday Five featuring some of the meals I've made in the past few weeks.

1. Crock pot Free-Range, Organic Chicken. Original recipe can be found here - I left out the cayenne pepper to make sure it wasn't too spicy for my bug. The chicken cooks up so tender it literally falls apart when you take it out of the crock pot. The huge advantage of cooking a whole chicken is that I can get at least two meals out of it. The first night we eat it straight out of the crock pot with veggies as a side. Second meal ideas? Chicken salad, chicken/cheese/veggie quesadillas, chicken fried rice, etc, etc, etc!


2. Homemade Chicken Stock with the leftovers from above. Recipe can be found here. I used some of the stock right away to make a delicious chicken, alphabet noodle, and vegetable soup and froze the rest in ice cube trays so I have a freezer bag full of stock cubes on hand when I need them.


3. Eggplant stacks with homemade ricotta. Eggplant slices were pre-salted to draw out the water and then prepped with egg wash, dipped in homemade whole wheat breadcrumbs, and pan-fried in olive oil. Ricotta and fresh basil were sandwiched between the slices and topped with marina sauce and fresh mozzarella before baking. This was delicious and I can't wait to try it again with fresh eggplant this summer.

 
4. Cobb Salad tweaked from a recipe found here. I added shrimp because the bug loves it and shrimp made the salad into more of a "meal" for my husband. All of my produce was store-brought organic, but I can't wait until we start getting fresh, local tomatoes and cucumbers to make it with. I used feta cheese instead of blue cheese because I always have it on hand. The salad dressing recipe was delicious with either red wine or apple cider vinegar and feta instead of blue cheese, but I recommend reducing olive oil to 2-3 TBSP.


5. Homemade yogurt! In the past, one of my co-workers and his wife told me that they made their own yogurt. At the time I was confused and slightly put-off by the idea. After reading up on the technique, I realized how easy it was and decided to give it a try! I followed the instructions here, but halved the recipe as it was my first batch ever and I didn't want to waste milk if it didn't work out. I started with whole milk from Meadowbrook Farms and Stonyfield Organic Whole Milk yogurt. I've been eating this for breakfast all week with bananas, frozen berries, and homemade granola. If I really want to sweeten it, I add a swirl of maple syrup or honey. FYI - I never used to look forward to eating yogurt for breakfast because I would always feel hungry an hour later - this is SO not the case when you have real yogurt made from real milk.


Here's a listing of some of the reading and viewing I've done recently to help me along:
Nina Planck's Real Food for Mother and Baby
Michael Pollan's The Omnivore's Dilemma
Real Food Tastes Good
100 Days of Real Food
Fat, Sick, and Nearly Dead
Hungry for Change

Thursday, May 2, 2013

Brave Party: Details, details, details!

I have to admit I have been struggling with getting the rest of my party details up here. This isn't yet classified on the DSM, but I think I am suffering from my annual case of post-party depression. Each year I spend months and months planning and prepping for bug's birthday party and then I invariably end up disappointed when it's over. The day of the party things get too crazy and I don't get to properly display, enjoy, or photograph all of the projects I obsessed over.

When I settle down to share the party details on here, I realize how much is missing from the photos. Then I get sad. So silly, but so true. I think I am finally recovering because I had a new event to plan (more on that soon). Anyway, here are the photos I have of all the extra details I haven't yet posted about.

I made the frilly tablecloth decoration I pinned from here and decorated the TV stand with Brave plush toys from the Disney Store

Birthday banner made using the Cricut Pretty Pennants cartridge.
I also created a very cute bunting using the Cricut and some bias tape that decorated the stairs leading into the party, but we have no pictures. Maybe I'll post a separate tutorial for that because it was so cute and so easy!

Birthdays aren't complete without balloons! We clustered bunches of 3-4 balloons and tied them up around the party space

I've been planning this party long enough that I picked up the garland and the fancy glittery stars hanging on the light from Target after christmas for literally pennies.

I dennoted all the "party rooms" by making decorative banners over each doorway. The doors were also labeled with fun Brave themed references such as, "Queen Elinor's Closet" for dress-up, "The Crafty Carver" for arts and crafts, and "Mor'du's lair - Do Not Enter" for my messy supply room. 

View of the decorations from the downstairs looking up.
My husband's uncle works for a bottling plant, so he gets me empty plastic bottles and any color cap I want to make these with any drink I want in them. Fun!

I included this photo to show the fun "Conversation with the Birthday Girl" I printed out (you can see it right next to the cellphone held by my cousin with the gorgeous curly red hair). I stole the questions from this blog.
 

Sunday, April 21, 2013

Brave Party: Activities

During my planning for this party I read a handful of blog posts about Brave themed parties in which the hosts planned a "Highland Games" event for the party-goers with archery and caber toss contests. Our kid guests were all under the age of 5 (with the exception of my sister's step-kids who are significantly older) so I wanted the activities to be at their level.

For games, I made my own cut-out archery game with homemade felt arrows to match the party colors and wrote a very simple three step treasure hunt. I originally intended the prize from the treasure hunt to be the party favors (bear stuffed animals), but ran out of time to plan out how to execute it. I just stuck with Brave fruit snacks as the prize at the end. I'm not going to post the clues I wrote for the treasure hunt, but if someone reads this and wants them, please contact me!

Add caption

For crafts I set up my old bedroom with two crafts. One table was set-up with string, wooden beads, multi-colored plastic beads, and plastic bear claws to make bear claw necklaces. I didn't realize until it was too late that the string I bought frayed easily making the necklaces difficult for the little ones to string:-( The other table was set up with cardboard crowns, markers, crayons, glue, glitter, gems, and Brave stickers to make crowns. The kids really seemed to enjoy decorating themselves (and their parents) with stickers and playing with all the gems!

Thursday, April 18, 2013

Brave Party: Eats and Treats

This post is dedicated to all of the yummy food we served at bug's Brave party. I originally was planning to cook traditional Scottish foods, but decided that was too involved to undertake with an infant at home and tried to go with simple, rustic foods with a bit of Brave inspired flare. I also tried to serve all the food on silver platters and wooden cutting boards to stick with the rustic/royal theme. As I mentioned before, I don't have pictures of many things because of the circumstances at the party and I'll just fill in the details.

Appetizer Table

  • Bread Dip (the green bowl sadly ended up on the table when I wasn't looking and crashed my careful plan for silver and wooden platters for all the food)
  • "Bulls eye" fruit platter made from Alpine melon, blackberries, and strawberries
  • Fresh grapes and cheese cubes (Sharp Cheddar, Monterrey Jack, and Tomato Basil Cheddar)
  • Assorted crackers and fresh breads
  • Wedge cheeses (Gouda, Swiss, Garlic and Herb goat cheese, Plain goat cheese) and kielbasa with assorted spreads (pepper jelly, spicy mustard, and corn relish)
I'm not sure how it happened, but I have no pictures at all of the main course. My menu included:
  • Baked ham
  • Chicken legs (marinade was based loosely on this recipe)
  • Mashed sweet potatoes
  • Buttered corn
  • Baby carrots
  • Fresh rolls
  • Fresh salad with strawberries and apples
  • Fruit skewers fashioned to look like arrows (melon cubes and strawberry arrowhead)
Again, we never got a photo of my dessert table which I obsessed over:-( In addition to the photos below, we also served raspberry thumbprint "spell cakes" and the "scottish sweet buns" (based on this recipe).

Brother bear cookies
Months ago I pinned a cute idea to make bear cookies, but then I stumbled upon the Wilton stackable teddy bear cookie cutters at Joann's and picked them up. I haven't done royal icing cookies in a long time, so I used the tutorial here to brush up on my skills. FYI - these cookies took FOREVER to make, it was a three night process!

Cotton Candy Wisps
I wanted to rent or buy a cotton candy machine to make wisps, but decided that would cost too much money so I just went to Hoffman's (a local extremely overpriced mini amusement park) and purchased two bags of the stuff.

Birthday Cake!
I was inspired by this cake I pinned at the beginning of my planning process. I purchased the figurines from the Disney Store online. I really wanted the sleek look of fondant, but hate how it doesn't taste good. Awhile ago I had pinned this recipe for a homemade marshmallow fondant and decided to try it out - it worked perfectly!

Wednesday, April 17, 2013

Brave Party: Getting In Character

This begins my series on planning and throwing my daughter's Brave themed birthday party. I will preface each post by reminding readers that the day of the party was SO hectic (we arrived to the party location late due to a mix-up with the balloons and had a cranky teething 5 month old that only wanted mommy or daddy) that many photos were missed. I will describe any additional details that I don't specifically have photos of.

To set the stage, the party was hosted at my parent's house. They are currently in Florida so I was able to use their house completely at my whim - taking down pictures, putting up decorations days in advance, etc. I set up their living room as a general play area with kid-sized tables for eating, the dining room and kitchen as food stations, my sister's old bedroom as a dress-up room, my old bedroom as a craft room, and my parent's bedroom as my storage room.

Starting at top left and going counterclockwise: Baby bear in her crocheted bear hat, Me in my Brave tapestry shirt, Birthday Girl in her Merida dress, Merida ribbon headbands, and Bear ear headbands.

One of the things I really wanted to set the mood for the party were costumes and accessories to help the guests really feel like they were part of the movie.

  • This started with finding a Merida costume for the birthday girl. I had my sister check the official stores in Downtown Disney for the highest quality dress possible, but they were not yet selling a Merida dress. I settled for one from the Disney Store online. It is not nearly as nice as the Cinderella one we purchased in the Magic Kingdom, but is far better than the cheap ones they sell at the toy stores.
  • Bug's favorite part of Brave is when the little brothers turn into bears. I knew I had to find a way to turn her little sister into a bear too. A quick search on pinterest brought up a very cute Brave inspired knit hat. I forwarded the photo to a friend whose cousin crochets and within days she produced the adorable hat you see above. 
  • During one of my many virtual shopping experiences online at the Disney Store I stumbled across a woman's shirt depicting the family tapestry (on sale of course!) and had to buy it for myself so I could be in character as well.
To allow the guests to get into the spirit of the movie I set up my sister's old bedroom as "Queen Elinor's Closet" and filled it with accessories... 
  • Keeping with the bear theme, I created a bunch of headbands with bear ears for guests to wear at the party. I purchased the purple headbands (how lucky that the only color available fit my color scheme perfectly!) for less than fifty cents apiece at Party City and made the ears out of black and gray felt. I loosely based them on this tutorial I used last year to make Mickey ears.
  • The Merida headbands were a project I couldn't help making after I found this tutorial on pinterest. I used her ideas, but decided to make Merida's fancy dress instead of the casual dress featured in her directions. If I ever get around to it, I will post my own tutorial.
  • Not pictured: I set up my sister's old desk with piles of Brave temporary tattoos and water/washcloths to apply them. I used my sister's old dresser to lay out all of the headbands I made. I also put out various beaded necklaces and plastic rings with a few handheld mirrors for the kids to dress up and check themselves out.

Sunday, April 14, 2013

Another birthday down


As anticipated, I haven't been blogging because I've been swamped getting through each regularly hectic day and then planning bug's 4th birthday party. The big event was yesterday and it really went well! The house was packed (we had over 50 guests, 16 of them kids!) and my baby bear was teething so things were more hectic that I would have liked, but my bug still had a blast.

Over the course of the week I will be sharing the details of my planning, decorations, food, and activities. Unfortunately, my husband didn't get to take as many "detail" photos as I hoped for, but I will share my ideas even if I don't have the photos to back them up.

Monday, April 8, 2013

Brave Party Preview

As I anticipated, things around here are B-U-S-Y! What I didn't expect was that in addition to party prep we were going to be preparing to sell our house this week as well (open house the day after the big birthday party!). We've been talking about moving for months, but all of a sudden we realized it was time to get going if we want to be in a position to reserve a lot in a new development that opens this spring. For the past week it's been a constant struggle back and forth between packing and baking, crafting and cleaning. So far I think I am holding up pretty well.

To hold my (few) loyal readers over until I can get back to my regular blogging, here are a few sneak peek photos of my Brave party projects...

Cookies to look like the Scottish Sweet Buns the triplets are always after

Bear party ears

Merida ribbon headbands

Felt and dowel arrows

Archery cutout game
Birthday banner in progress
Giant box of bears from the Disney Store for party favors

Saturday, March 30, 2013

Happy Easter!

You know your kid is spoiled (or a perfectionist just like you) when you whip these up without notice because you realize that it's the last school day before Easter and you haven't made a treat for the preschoolers yet and her response is, "They were yummy, but next time you should really get jelly beans instead of M&Ms because they look more like eggs."

I am not going to be able to post a lengthy recipe because I totally winged it on these. Here are the components:

  1. 24 Funfetti cupcakes made from the box mix substituting unsweetened applesauce for the oil
  2. Homemade buttercream tinted light green (totally improvised this by starting with 1 cup of butter whipped in the Kitchen-aid and then just started pouring in dream whip, vanilla extract, milk, and confectioner's sugar til I liked the way it tasted)
  3. Easter M&Ms
  4. White chocolate bunnies that I used candy melts and a super old bunny lollipop mold (didn't insert the sticks) to make
Anyway, Happy Easter to those that celebrate:-)