Follow Me on Pinterest

Sunday, December 16, 2012

Tis the season...


If you hadn't guessed by my prolonged silence after the last pregnancy related post...our second baby was born! Although she came 5 days later than my due date and I had the joy of two days of non-productive contractions, the labor and delivery were a breeze once everything got going. My recovery time was minimal and we all settled into a routine as a family of four without issue.

As I sit here typing this (almost exactly 6 weeks following her birth), I am feeling great. I've been back to work for 2 weeks, am 2 pounds below my pre-pregnancy weight, and am in the midst of my usual holiday baking/cooking/crafting craziness.

There is another thing that is new to our house this year for Christmas - we have our very own Elf! "Sugar" has been here keeping tabs on our little bug and reminding her to be a good girl for Santa. Sugar has been leaving the bug special treats each day to count down the 12 days until Christmas. Below you can see what we've been up to so far...
To kick-off, Sugar and her friends decorated bug's room with snowflakes and paper chains

12 - The first day featured a cup with hot cocoa mix and two new Christmas books

11 - Sugar left all the ingredients to make tree shaped pizzas for dinner
10 - Everything to make cinnamon ornaments
I didn't get a photo of Day 9 in time, but Sugar left her lots of silly dress up items to play with and pose for a silly photo shoot. Props included a singing tie, multiple headbands with bouncy Santas or snowmen, bead necklaces, and feather boas.

Monday, October 15, 2012

Pregnancy Take 2

If it seems like my blog has only been about cooking recently, you're right! I'm not sure why it's been the only thing I've been motivated to post about as there have been so many other interesting things going on for me. I figured I'd take a few moments and reflect on what has made this pregnancy SO different from the last one before she's out and I'm too busy with a newborn to post anything!

  • At home, I felt like my husband and I were talking about my first pregnancy all the time. We discussed names for a much longer time, talked about what baby gear we needed, and went through a lot more of the excitement and fears of "new parents."
  • This second time around, we barely discussed the fact that I was even pregnant until much later. I think some of that came from anxiety over the loss I had in between pregnancies and the threatened loss at the beginning of this pregnancy, some came from being busier around the house with a 3 year old, and some came from the comfort zone of "knowing what to expect."
  • At work, last time I felt like my baby bump was akin to a big, burning scarlet letter. I was an intern doing my residency and when I revealed my pregnancy to my chief residents because I needed a few hours off to get the quad screen ultrasound, they refused. After that, I was afraid to allow my pregnancy to be seen as a sign of weakness and didn't ask for any special treatment until I finally broke down and asked (under medical advisement) NOT to do a 24 hour call at 38+ weeks.
  • During this pregnancy my work has been amazing! They have been completely flexible about what I want to do for maternity leave, how I want my patients scheduled, and are constantly offering to cut back my hours or responsibilities if I feel I need a break.
  • During bug's pregnancy I struggled a lot with how my body was "letting me down." I am naturally a busy person and didn't like how tired and achy my body got and felt very antagonistic towards what was happening a lot of the time. I really didn't like being pregnant because I felt like it was stopping me from being me. Probably also due to the attitude I encountered at work, I felt I couldn't ever take it down a notch or ask for help which made me more stressed.
  • I think I was prepared for that to happen again this time and have been pleasantly surprised that it hasn't. The pregnancy itself has been similar (reflux a little worse, weight gain a little less), but I feel more in sync with my body and do what I can and accept the times I need to back off. 
  • Prepping for a baby was a lot harder (although more exciting) last time because we were starting from scratch. When getting ready for bug, we had to accumulate all the "baby stuff" which meant numerous shopping trips for nursery furniture, researching and refining registry choices, baby showers, and SO many thank you notes.
  • This time we literally have everything. We didn't even think about setting up the nursery or the bassinet or anything until about two weeks ago when we realized she could actually be born and come home any day. Then, it was a matter of dusting things off that were in the basement and collecting other things from where they were being stored at grandparent houses. So much easier, but a bit anti-climactic.
All of the other differences aside, I think the absolute biggest contributing factor to what made this pregnancy different was having bug around. She has made this pregnancy harder in many ways - I can't just flop on the couch and do nothing at the end of the night, I don't get much "alone time" to re-group, and I am constantly picking up her little girl messes that don't bother Daddy, but drive me insane. On the other hand, she has been a fresh new person to share the fun and excitement with and her reactions to my pregnancy have been some of my favorite moments. I love to see her face light up when she feels the baby kick. I crack up every time she tells me to open my mouth so she can "talk to her sister." And my husband and I have shared more than a few giggles at her attempts to understand breast-feeding (she nurses her dolls and gets very concerned about why I don't have milk for her sister yet...). 

So as this pregnancy draws to a close, I have to say it's had it's own challenges and I'll be happy when it's over, but I feel much more at peace and content at this stage then I did 3 1/2 years ago...

Friday, October 12, 2012

Friday Five Favs: Pumpkin Recipes

Fall is absolutely, positively my favorite time of year for baking and pumpkin is by far my favorite main ingredient. I have been lazy so far and been using canned pumpkin puree, but I promised the bug we would try our hand at roasting our own pumpkin very soon. Here are some of my favorite pumpkin recipes that I've discovered this year - be warned I like my baked goods heavy on the spices and usually double what is called for in most recipes.


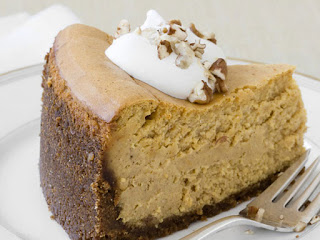
1. Almost Famous Pumpkin Cheesecake from the Food Network: I made this last week for our cousin's husband's birthday and it was a huge hit. The only changes I made were: to add some cinnamon and nutmeg to the graham cracker crumbs when I was making the crust, I didn't add pecans to the top, and I make my whipped cream with a dash of vanilla extract and a tablespoon or so of confectioner's sugar.


2. Pumpkin Pie Bars from Annie's Eats: I also made these for our cousin's husband's birthday because I wanted a different option because I didn't know what everyone would have a taste for. These really do come out with a creamy pie texture and are wonderful - my father-in-law liked these even better than the cheesecake (which was a big success). The only thing I changed was to omit the nuts because I didn't know if there were any allergy issues.


3. Pumpkin Whoopie Pies from Made in Melissa's Kitchen: I made these as a dessert the time before her husband's birthday when we went to our cousin's house for dinner - have you noticed a trend? Her husband loves baked goods so much that I find it very gratifying to bake for him:-) These were absolutely amazing! The cookie/cake batter is perfectly spiced and keeps the fall flavor prominent even with the sweet frosting. The only downside is the cream cheese in the frosting means you have to chill them and that makes the cake part get a little sticky and moist. I would like to try them again with a straight buttercream.


4. Pumpkin Cupcakes with Salted Caramel Buttercream from Made in Melissa's Kitchen: Bug and I made these for fun one weekend and everyone who tried them was blown away by how good they were. I was impressed with how spicy and moist the cake came out (I did double all the spices except the ginger) and how totally indulgent the salted caramel buttercream was. I had multiple coworkers in my office rave that this frosting was their favorite they have ever tasted.


5. Pumpkin Pancakes from The Curvy Carrot: We made these for breakfast last weekend and I thought they were quite yummy. Beating the egg whites gives the pancakes a really light and fluffy texture that is worth trying if you have never made a pancake like this. Definitely at least double the spice called for to get the fall flavor you'd expect from a pumpkin pancake.

Tuesday, October 2, 2012

Slow Cooker Apple Butter


This weekend I realized my apple supply was dwindling AND they were starting to get some soft spots. As we were planning to be out of the house all day, I couldn't dedicate myself to any big baking projects to use them up before they spoiled. I quickly scanned my list of "to do" apple recipes and realized that nothing fit! Always willing to improvise when it comes to cooking, I did a quick google search and decided to switch my overly-ambitious-stand-by-the-stove-for-2-hours-stirring (really, I have no idea what I was thinking...) apple butter for a slow cooker version. I was NOT disappointed by the swap and I don't think you will be either because this recipe is delicious!

 Based off a recipe found here from My Baking Addiction...

4 pounds apples - peeled, cored and sliced
1 cup granulated sugar*
1 cup light brown sugar, lightly packed*
2 teaspoons apple pie spice

1 tablespoon ground cinnamon
1/2 teaspoon freshly grated nutmeg
1/4 teaspoon ground allspice

1/2 cup apple cider
1 tablespoon pure vanilla extract

*I used more sugar because my apples were a tart variety. If you have sweeter apples, scale back your sugar*

  1. Chop up all apples and pile into your crockpot.
  2. Mix both sugars and all spices together until blended in a medium sized bowl.
  3. Pour sugar/spice mixture over apple slices and stir.
  4. Add apple cider to crockpot.
  5. Cook on low heat setting for approximately 7 hours.
  6. Add vanilla extract and stir mixture well. It will have darkened in color and many of the apples will have "dissolved" into the mixture. Cook 1 more hour.
  7. Turn off heat and use blender to puree mixture (use immersion blender if you have one!). Be careful as it is going to be very hot!
  8. This recipe made four small mason jars (with a little extra that I just spooned into a small bowl). If you can be sure you have people to distribute it to that will use it within 2 weeks, your work is done! I went the extra step and canned it according to the instructions here.


Saturday, September 29, 2012

Apple Fritters

Knowing the medical side of things and that healthy weight gain (20-30 pounds for average weight ladies) is the key, I don't believe in the old saying that pregnant women should "eat for two" or eat whatever comes to mind. That said, I've already made it to 35+ weeks and have gained less than 20 pounds because I've had a lot more reflux and sour stomach this time around. It's not horrible, but it's enough that I haven't had much of an appetite for dinner on at least 5 of 7 nights a week. Breakfast is really my only guaranteed "good" meal of the day.

I've used this background to justify making apple fritters (clearly a dessert) for breakfast. I told myself they are kind of the same as donuts right? Right?! And we all know donuts are a SUPER healthy breakfast to begin with. Anyway, enough trying to make myself feel better about consuming over a half dozen of these before 10am...here's the recipe!


Based on the original recipe from The Pioneer Woman

For the fritters:

  • 2 cups of unbleached all purpose flour
  • 1/2 cup sugar
  • 2 1/4 tsp baking powder
  • 1/4 tsp salt
  • 2 tsp apple pie spice
  • 1 tsp cinnamon
  • 2 large eggs
  • 3/4 cup 1% milk
  • 2 tsp vanilla extract
  • 1 large apple, peeled and diced
For toppings:

Glaze
  • 1 cup confectioner's sugar
  • 1 tsp vanilla extract
  • Up to 1/4 cup of milk (add by TBSP til you get a nice consistency)
Cinnamon Sugar
  • 1/4 cup sugar
  • 2 tsp cinnamon
In a mixing bowl, combine flour, sugar, baking powder, salt, and spices.
In a separate bowl, beat the eggs with a fork, then add milk and vanilla.
Gently fold dry and wet ingredients together until just combined. Fold in apples. Make sure you have enough apples to make a very chunky batter.
Heat a couple of inches of canola oil in a dutch oven or pot over medium heat. When it gets hot, drop a little drop of batter into the oil. If it sizzles immediately and rises to the top, the oil is ready; if it burns, turn down the heat.
Drop teaspoons of batter into the oil, six or so at a time. Sometimes they'll flip over by themselves; sometimes you have to flip them. Cook them long enough to make sure the batter's cooked through, about 2 to 3 minutes total.
Remove and drain on a paper towel. Dip fritters in glaze (I dipped one side and then placed on a wire rack to allow excess to drip off as they cooled for 10 minutes) or shake in a bag filled with the cinnamon sugar mixture.
Serve warm!

Tuesday, September 25, 2012

Apple Sheet Cake with Salted Caramel Buttercream

This is actually not the first recipe I made with my apples, but it was so good that I am blogging about it first.  So here's the deal, my photo of this cake is terrible. It's dark and does not at all show how amazing this cake is. The truth is that my husband changed photo editing programs and the new one scares me - I've known for months that I need to bite the bullet and ask him for a mini-tutorial on improving my photo quality, but my sad photo of this cake might be the final straw. Alas, here it is...


If you've ever tasted my baked goods (or have enjoyed previous baking posts) and trust my palate at all - MAKE THIS CAKE! I based the recipe from the original that can be found over on Mother Thyme's website

For the cake:

2 cups flour
1 teaspoon baking powder
1/2 teaspoon baking soda
2 teaspoons cinnamon
1/8 teaspoon nutmeg
1 cup unsalted butter
2 cups sugar
4 large eggs
1 teaspoon vanilla extract
1/3 cup milk
2 heaping cups peeled grated apples (about 2 medium apples)

  1. Preheat oven to 350 degrees and prepare pan (9x13 rectangular pan) by greasing and flouring.
  2. Combine first 6 ingredients in a small bowl.
  3. Cream butter and sugar until light and fluffy with electric mixer.
  4. Add eggs one at a time, mixing for 1 minute after each addition.
  5. Add milk and vanilla, mixing well after addition.
  6. Stir in grated apples.
  7. In three additions, gradually add flour mixture just until dry ingredients are incorporated into batter.
  8. Pour into prepared pan and bake in preheated oven for 30-35 minutes.
For Salted Caramel Frosting:
1 1/2 cups (3 sticks) butter
1 1/2 cups light brown sugar
1/3 cup half and half
1/4 teaspoon cream of tartar
3/4 teaspoon coarse salt

2 1/2 cups confectioners sugar
1 tablespoons milk
  1. Make the caramel by melting butter, light brown sugar, half & half, and cream of tartar over medium heat.
  2. Boil the mixture for 3 minutes.
  3. Remove from heat, stir in salt, and let the caramel cool.
  4. *After making the caramel I realized that the original recipe makes WAY too much frosting for this smallish cake. Once the caramel was cooled, I only used half to make the buttercream. I saved the rest of the caramel to use for a different recipe*
  5. Mix 1/2 of the caramel with 1/2 -1 cup of confectioner's sugar at at time. After all sugar is incorporated, add milk and whip the frosting for at least 1 minute.
The frosting is delicious, but this cake really is SO GOOD that it could stand alone or be adorned with a simple scoop of vanilla ice cream or dollop of homemade whipped cream.


FYI - I don't have any "in progress" shots of this cake because I was baking with this little monster:-)


Monday, September 24, 2012

Apple Quest 2012 (or how I plan to use a peck of apples)


As a kid, as a young adult, and as a mommy I remember picking apples nearly every fall. Unfortunately, due to unseasonable warm spring weather followed by a hard frost, the local apple orchards are struggling to harvest their crop this year and most are forgoing the tradition of "pick-your-own." There was hope that Indian Ladder Farms would be able to host PYO this past weekend, but the field was completely picked over on Saturday and they were only selling apples in the store when we got there Sunday morning. Although disappointed, we made the best of the morning by visiting all the animals, snacking on fresh cider donuts and cider, and picking up a peck of Cortland apples from the store. It's pretty traditional to make an apple pie after picking fresh apples, so I'm trying to branch out this year and have a new line-up of recipes to try!

Here are the recipes I've bookmarked to use up my apple supply. These are all in addition to the usual snacking as is, eating with sliced cheddar, slathering with peanut butter, and dipping in caramel sauce that we usually do. I'll try to post the ones I get to with my commentary on how they came out, but for now, feel free to take advantage of my hours of pinning and blog perusing and make some yourself!

Apple Pancakes from Serious Eats
Caramel Apple Cheesecake Bars from Made in Melissa's Kitchen
Apple Pie Cookies from Annie's Eats
Apple Fritters from The Pioneer Woman
Apple Cupcakes with Brown Sugar Buttercream from Made in Melissa's Kitchen
Caramel Apple Dip from Made in Melissa's Kitchen
Apple Butter from Sticky, Gooey, Creamy, Chewy

Friday, September 21, 2012

Friday Five: Children's Books

I'm a book nerd. Always have been, always will be. I'm not ashamed either. I 100% embrace my love of books, reading, and quoting obsure Harry Potter literary references. It's who I am and I'm proud of it! I figured I would celebrate this love today by featuring the five children's books I most enjoy reading to my little bug.


1. The Very Hungry Caterpillar: We love reading this book! We have the small board book and it's in our regular bedtime rotation. After reading this literally hundreds of times, bug asked this week as the caterpillar was chowing through the "junk foods" - "Why doesn't he just eat the nice green leaf?! He's gonna get a tummyache!" - lesson learned.

 2. If You Give A Mouse A Cookie: This book has been one of the bug's favorites for as long as she could request books. She loves all the variations (If you give a cat a cupcake, If you give a dog a donut, etc), but I'm a traditionalist and prefer the original because the "flow" of the story feels like that of a child's trail of conscience - meandering here and there and finally back to the start all over again.

 3. Go, Dog, Go! This book has to make my top five because of my history with this book. Although it is definitely one of bug's favorites and she requests it on a regular basis, I have been reading and re-reading this book since my sister was bug's age. This was by far her favorite book (and she is NOT a book lover) and she used to ask me to read it to her over and over and over and over (you get the idea).


4. Ladybug Girl: I adore this feisty little protagonist. Although as Lulu she's "just a little girl", when she steps into the role of Ladybug Girl she "can do anything!" From overcoming scary obstacles (imaginary sharks), to making a difference in the world (picking up a rock to clear the way for some ants), to adding perspective to the situation (noting that her brother looks "little" from far away) there is a very empowering undertone and I love it!

5. The Lorax: I can't remember ever reading this book as a kid, but if I had I would have LOVED IT. I thought of myself as a little hippie-save-the-whales-recycling-club activist when I was younger and this book would have fit right in with that image. Now the bug loves this book and wants to be the Lorax for Halloween. Although she isn't quite big enough to really get what he stands for, it still makes me happy.

Thursday, September 13, 2012

Trader Joe's Thursday

Unless you live under a rock, it's impossible that you could be in the capital district and not know that Trader Joe's (finally!) opened in Albany about a month ago. I have been hoping for this for the past 10+ years since I first experienced TJ's in Boston as a college student. Back then, the groceries I could buy were limited to what I was willing to carry back on the T and then lug across campus (one bag usually). For the past few years we have tried to bring home non-perishable items from the TJ's on Cape Cod (snacks and jarred products mostly), but nothing can compare to actually having a local TJ's to try the huge variety of foods they have available - especially the frozen goods, meats, and cheeses.

Now that it's here, I've decided to post a weekly product review of something new. So here's the inaugural review: Frozen Biryani Rice!

This is an amazingly easy and tasty side dish/main meal that we have already eaten at least twice. It is not the same type of biryani that I have had at the local Indian restaurants I frequent, but it's a very tasty at home meal. All you have to do is add a little bit of oil to your pan/wok and stir fry the rice until it is heated through. The dish is not spicy hot, but is spicy flavorful and smells delicious as it cooks. When we make it, we've cooked half a bag for two of us to eat as a side dish. 

I personally would eat this with a piece of naan and call it a night, but I have made it into more of a main meal for my husband by pairing with the TJ's marinated curry chicken tenders and TJ's vegetable samosas. 

Sunday, September 9, 2012

Sunday Breakfast

With my work schedule (and love of breakfast foods), my little bug is lucky enough to have a full cooked breakfast most days of the week, but we tend to do it up a little fancier on Saturday or Sunday. I found this recipe on a favorite food blog (Picky Palate) and knew the bug would go CRAZY for it - what three year old (or pregnant thirty year old) doesn't want to have an excuse to eat marshmallows and chocolate chips for breakfast?!

See the link above for her original recipe, here are my modifications (based on what I had available in the house...)

Gooey Marshmallow Chocolate Chip Pancakes
2 Tablespoons melted butter
½ Cup fat free half and half
½ Cup 1% milk
2 eggs
1 ¼ Cups unbleached all purpose flour
2 Tablespoons sugar
3 teaspoons baking powder
1/2 Cup 60% cacao chocolate chips
1 Cup mini marshmallows
Just about ready to be flipped...
Perfect golden crust on one side
On their way to the table!

I did serve with maple syrup on the side, but we all agreed they didn't need it! I also didn't sprinkle any extra chips or marshmallows on top. Accompaniments included fresh local eggs scrambled with a sprinkling of cheddar and fresh local slices of watermelon with chilled orange juice or organic milk.

Saturday, September 8, 2012

DIY Flavored coffee

This may seem so simple it isn't worth making a post about, but I found this idea on a blog a few years ago and have been doing it ever since! This is especially handy right now as there are fewer flavored varieties of decaf coffee and I'm limiting my caffeine during pregnancy.


DIY Cinnamon Coffee
For Keurig single cup (what I use)
Fill brew cup as you normally would with coffee grounds. Sprinkle 1/8tsp (or generous dusting) of cinnamon over the top of the grounds. Brew as normal. Prepare with milk/sugar as you normally would. *I wanted mine iced today, so I chilled in the freezer for 30 minutes before pouring over ice to enjoy.*

For regular coffee maker
Fill coffee filter with grounds as you normally would. Add approximately 1tsp cinnamon for each 2-3 cups you plan to brew. Add less the first time and titrate up to get the spiciness you want. For example, if setting the pot to brew 10 cups, add just 3tsp spice the first time and increase up to 5tsp if you want it spicier.

This works really well with pumpkin pie spice or other spice combos to get a christmas-y gingerbread blend (think 1 part nutmeg, 1 part ginger, 2 parts cinnamon).

Friday, September 7, 2012

Friday Five Favs: Fall Firsts

One of my favorite recurring features on other blogs I follow is a weekly theme of some sort. I've decided to try out a weekly "Five Favs" that can be any five things I am into or thinking about that week (crafts, recipes, books, movies, etc!). I figured I'd go all out with the alliteration for my first installment and give you five things I love about the early fall...

1. Pumpkin coffee
Although Starbuck's pumpkin spice latte is my ABSOLUTE favorite, I have to admit that in the earliest days of fall when it's still warm/hot during the afternoon I do hit up DD for iced pumpkin coffee. DD's pumpkin latte is gross, but I like the syrup in their regular coffee.

2. Apple picking
I've heard rumors that it's going to be a bad year for apple picking due to all the strange weather we have had, but I am hoping to find at least one local orchard that we can visit for our yearly fix of this super fun upstate NY tradition.

3. Cooler weather!!
I am not a summer person and really can't stand humidity ever, but especially this year (as I am carrying around an extra 15lbs) I am thrilled that we are finally starting to have cooler mornings and evenings. Nothing makes me happier than crisp air and a warm sweater. Here's to dreaming I'd actually FIT in one of these cozy J Crew sweaters...

4. Halloween costumes
In my house, planning for Halloween starts early. My little bug (pictured below in her straight-from-Disney World Cinderella dress from last Halloween), has said for months that she wanted to be Ladybug Girl from the book series. Then, she saw the new Lorax movie and is insistent that she is going to be the Lorax because he, "speaks to the trees." With baby #2 due on Halloween and my belly getting larger by the moment, this crafty mamma needs to get working on the logistics of a Lorax costume ASAP...

5. School supplies
I understand that I am no longer a student and my bug is not yet old enough to require school supplies, but I love seeing them out in the stores anyway. I have a very dorky excitement and giddiness that is peaked each time I walk by boxes of crayons for 50 cents and see stacks of embroidered backpacks with matching lunch bags.


Thursday, August 30, 2012

Goldfish Marshmallow Pops: Photo Tutorial

A few weeks ago I spotted this fun idea to make a goldfish marshmallow pop on Pinterest from a super cute goldfish themed birthday party. I saved the idea to make for my bug's preschool class for an end of the summer treat. **Please forgive the non-uniform nature of these photos, I tried using my i-phone and will stick with my actual camera from now on.**

Here are the step-by-step photos:

Everything you need: blue candy melts, goldfish crackers, large marshmallows, graham crackers, white pearl sprinkles, and lollipop sticks
Get your candy melts ready to go! I prefer to melt them in a glass bowl. I like to start the melting process in the microwave for 30 seconds and then switch to a slower melt in a simmering water bath
This is how they look after they start to melt in the microwave. Stir well and add to your water bath - this can be an electric frying pan or regular pan on the stove over low heat with about an inch of water in it
After the candy is melted, it will likely still be a bit thick (when you stir, you can see the peaks/swirls stay in the chocolate as above). You don't want to try dipping your marshmallows when it's still this thick as it will clump and be really heavy on your pop. You can thin the chocolate by adding a drizzle of vegetable or canola oil. This will not alter the flavor and will thin it out perfectly. Just add a tiny bit, stir thoroughly, then add more if needed
This is how you want your chocolate to look when you are ready to dip...thin and smooth
I used the bite sized graham crackers - about 1 cup - and finely ground them in my mini processor
You want it to be nice and "sandy" in consistency
Set up all your decorations - goldfish, pearls, and graham cracker crumbs
Dip the end of the lollipop sticks into the melted chocolate and then stick into the marshmallows. Let the chocolate harden to help stabilize the pops
Dip your pop into the melted chocolate and shake off all the excess so you have a thin, even coating
Coat the bottom of the pop with the graham cracker crumbs by gently tapping the bottom into the bowl and rolling the sides in the crumbs to coat the bottom third of the pop
Press a goldfish cracker into the melted chocolate - it should stick without difficulty
Add two pearl sprinkles to look like bubbles coming from the goldfish's mouth
Place the pops on a cookie sheet lined with wax paper. You can place them in the fridge for 5-10 minutes to harden the chocolate faster if you want
Final product!

Saturday, August 25, 2012

Party Inspiration: Red Sox Bridal Shower

As I was on a blogging hiatus, I never posted about the planning and execution of my little sister's bridal shower. For years (long before she ever got engaged!), I knew I wanted to honor her love of the Red Sox and throw her a baseball themed shower. Once the question was popped and she started planning the wedding, she decided on hot pink and yellow as the color scheme. Taking my idea and her colors, I worked tirelessly to create a shower with ideas and decorations essentially coming from scratch as nothing was readily available pre-made and I didn't want to spend a fortune hiring someone from Etsy to do the dirty work for me. I am putting these photos out there because I hope my ideas will help inspire someone else someday...

Details
My cricut machine and "Sure-Cuts-A-Lot" programs were working overtime creating these custom Boston Red Sox "B"s in various sizes to decorate the gift table and outdoor seating area. Tiny "B"s adorned photos of the happy couple (and family!) at Fenway - these were coupled with fresh flowers in inexpensive bowl vases as table centerpieces.

Cricut Boston Red Sox "B"s
Party set-up in the backyard. Paper lanterns from Hobby Lobby.
Simple Centerpieces.
Glass vases for less than $1 at AC Moore. Flowers from Sam's Club. Hot Pink pearls from Michael's. 

Menu
I created a baseball/Boston themed menu featuring snacks/appetizers you'd find in a ballpark and a dinner menu straight from the North End. I added a flare to the menu by stamping it with a baseball stamp (the same I used to seal the invites) and embossing it for extra sparkle.

Snacks: "Fenway Franks" (pigs in a blanket), jumbo soft pretzels, buttered popcorn (in handmade paper treat cones), peanuts, and Cracker Jacks
Dinner: Tossed Salad with Olive Garden style dressing, caprese salad, bread and butter, baked ziti, and eggplant parm
Handmade Menu
Paper treat cones

Dessert
For dessert, I ordered a custom cake from a local baker. Unfortunately, this did not turn out as I had hoped. The baker did not take the appropriate notes during our meeting and had to change the entire cake last minute which resulted in (almost) the right design, but with shoddy decorations that were airbrushed instead of actual frosting mixed to the right color. I have liked this bakery in the past, but will not be using them again as I was very particular in my requests, brought a photo of the cake I wanted, and pointed out other cakes in the store that were done in the colors I wanted for the cake. 

My mom made chocolate dipped marshmallow pops and I made baseball cake pops to fit the theme as well. I also made a beautiful fresh fruit salad served in a trifle dish (not pictured). 
Baseball Cake
Dipped marshmallow pops
Baseball cake pops

Living Decorations
As an added touch to carry through the baseball theme, I made custom "team" shirts for all the bridal party members. All t-shirts and iron-on decorations were from Hobby Lobby. 
I'm going to ignore how unflattering this photo is of me to show the shirts...front of the t-shirts featured our names and a rhinestone number.
The back of the shirts featured the "Team Bride" logo and the "title" of the bridal party member - my bug's had a rhinestone iron-on for "flowergirl".

So that's it! I hope my work and ideas help someone planning a girly baseball themed party out:-)